Compiling GhidraNinja’s Pico Debug’N’Dump

What is the Pico Debug’N’Dump?

The Pico Debug’N’Dump is a RPi Pico-based board designed by @ghidraninja used for hardware hacking. It makes use of the Pico capability to provide a flexible platform.

In particular, it comes with four different firmware programs

Plus you can write your own programs if you have the skills.

Hardware features

The Pico Debug’N’Dump adds the following hardware features as an add-on to an RPi Pico:

  • A display
  • Switch selectable voltage (1.8V, 3.3V, 5V)
  • Power Supply On/Off
  • 12C/SWD enable/disable
  • Glitcher
  • Sockets and connectors
  • A Reset switch

Compiling the software

Unfortunately, the pre-compiled firmware isn’t included. You have to build your own. The process isn’t well documented. I did it once, and when I went back months later, I had to re-learn the steps. These are the notes I took.

Make sure you have an up-to-date version of Cmake. If you try to build the software using a version earlier than 3.13 you will get a warning. If your OS doesn’t have it available (i.e. Ubuntu 18.04) get it from the CMake site. There is even a apt-repository.

Download the git repository. Normally a simple git clone will work. However, there are submodules that you needed. You can install them manually, but there is a better way if you have a github account.

You need to make sure you have a ssh key generated and installed in github

If you don’t do this step, you will get the error

git clone <url-to-repository>
git submodule update --init --recursive
Cloning into '<repository>/pdnd'...
git@github.com: Permission denied (publickey).
fatal: Could not read from remote repository.

If you don’t have a github account you have to download and install ghidranija’s pdnd-lib repository. Then you have to build it and copy it into your other repositories. Or you can get a github account and install your public key. After your github account is set up, execute the following


git clone <url-to-repository>
git submodule init --recursive
gig submodule update --recursive

Normally, the next steps are as follows

git clone <url-to-espository>
cd <git directory>
mkdir build
cd build
cmake ..
make

However, you will likely get the error

Make Error at pico_sdk_import.cmake:44 (message):
  SDK location was not specified.  Please set PICO_SDK_PATH or set
  PICO_SDK_FETCH_FROM_GIT to on to fetch from git.
Call Stack (most recent call first):
  CMakeLists.txt:4 (include)


-- Configuring incomplete, errors occurred!

There are a couple of problems. First of all, we’re missing the PICO sdk.

Let’s install the Pico SDK to fix this problem.

git clone --recurse-submodules https://github.com/raspberrypi/pico-sdk.git

This will take a while. Stretch your legs. Have a cup of coffee or tea.

If you don’t use the –recurse-submodules, you will have to add the tinyUSB modules. Next – build the SDK using the standard cmake steps:

cd pico-sdk
mkdir build
cd build
cmake ..
make

As you do this, you will see a messages such as

PICO_SDK_PATH is /home/user/Git/pico-sdk

Remember this for later. Now to build one of the firmwares for your Pico Debug’N’Dump, go to the git directory you downloaded and type

export PICO_SDK_PATH=/home/user/Git/pico-sdk # or whatever the value is
mkdir build
cd build
cmake ..
make

At this point you should have a file with the extension *.uf2

Hold down the BOOTSEL button and plug your board into to computer.

Drag the *.uf2 file onto your /media/user/RPI-RP2 partition. Then hit the reset button on the board and you should be ready to use it

Posted in Hacking, Hardware Hacking, Linux | Tagged | Leave a comment

Recovering data from a corrupted USB thumbdrive using ddrescue

A friend asked me for help. He has a USB thumbdrive that he used for backup and when he plugged it into his Windows system, Windows wanted to re-format the drive (and therefore erase his backups). Obviously a sub-optimal solution, so he asked me for help.

At least these were backups. Once, in the 1980’s, I was asked to recover someone’s PhD thesis from a floppy. They knew disks weren’t reliable, so they stored their thesis on a floppy – one well-used 5 1/4″ floppy – re-writing it over and over – without ever saving it to the “unreliable” hard disk. And in case you are wondering, the victim wasn’t trying for a PhD in science. I will refrain from commenting on the other majors.

It’s the first time I’ve tried this. I first tried booting up a DVD with a fresh copy of the SystemRescue CD. I first tried to mount the thumb drive using Linux commands.

I plugged-in in the USB drive and used dmesg to see any errors. It reported

[64351.134159] print_req_error: critical medium error, dev sdb, sector 8606965
[64351.158797] sd 6:0:0:0: [sdb] tag#0 FAILED Result: hostbyte=DID_OK driverbyte=DRIVER_SENSE
[64351.158807] sd 6:0:0:0: [sdb] tag#0 Sense Key : Medium Error [current]
[64351.158812] sd 6:0:0:0: [sdb] tag#0 Add. Sense: Unrecovered read error
[64351.158819] sd 6:0:0:0: [sdb] tag#0 CDB: Read(10) 28 00 00 83 54 f6 00 00 01 00
[64351.158824] print_req_error: critical medium error, dev sdb, sector 8606966

This identified the disk as sdb. I tried using fsck

fsck -t vfat /dev/sdb1
fsck from util-linux 2.31.1
fsck.fat 4.1 (2017-01-24)
Read 512 bytes at 0:Input/output error

No luck, I was getting an error. I then looked at the documentation, and it seemed ddrescue was the best way to go.

I typed

ddrescue /dev/sdb1 disk.img

I then checked the output file with the file command, and it hinted I did this wrong:

file disk.img
disk.img: data

This wasn’t a good sign. I was unable to mount this file system.

I figured the idiot’s approach to data recover wasn’t optimum, so I decided to do some more research on the Internet – like reading the instructions and following guides.

Well, the guides weren’t too helpful. They mostly covered hard drives. I also read that there was a documentation problem with ddrescue and the term logfile. Turns out logfile is a misnomer. The latest version refers it as a mapfile. A mapfile lets you restart an old unfinished session. You can therefore try several times to recover files. A logfile is usually a debug aid to track down errors in execution, So I decided to download the most recent version of ddrescue. I looked on github and found this repository. It compiled with no problems on my Ubuntu machine.

I tried again, and this is the result:


ddrescue -d -r3 /dev/sdb hdimage mapfile
GNU ddrescue 1.25-rc1
Press Ctrl-C to interrupt
Initial status (read from mapfile)
rescued: 51997 kB, tried: 431616 B, bad-sector: 431616 B, bad areas: 743

Current status
     ipos:   15702 MB, non-trimmed:        0 B,  current rate:    1536 B/s
     opos:   15702 MB, non-scraped:        0 B,  average rate:    295 kB/s
non-tried:        0 B,  bad-sector:  190344 kB,    error rate:   18944 B/s
  rescued:   15818 MB,   bad areas:    92292,        run time: 14h 48m 58s
pct rescued:   98.81%, read errors:  1770736,  remaining time:     20h 48m
                              time since last successful read:         n/a
Finished

Notice it took 14 hours to run. Did it work? I tried the file command on hdimage:

file hdimage 
hdimage: DOS/MBR boot sector; partition 1 : ID=0xc, start-CHS (0x0,0,33), end-CHS (0x3ff,254,63), startsector 32, 31266784 sectors, extended partition table (last)

Much better. So I tried to mount the device. I made some mistakes, as you shall see.

I wanted to use the losetup command tto create a loopback file system, which allows me to use a file as a file system. I typed “ls /dev/loop*” to find an unused filename. (I could also use “losetup -l”). /dev/loop25 wasn’t used, so I typed the following.

% sudo
# losetup /dev/loop25 hdimage
# mkdir /tmp/mnt
# mount /dev/loop25 /tmp/mnt
mount: /tmp/mnt: wrong fs type, bad option, bad superblock on /dev/loop25, missing codepage or helper program, or other error.

## oops. I'm doing something wrong. Let's try fdisk

# fdisk /dev/loop25

Welcome to fdisk (util-linux 2.31.1).
Changes will remain in memory only, until you decide to write them.
Be careful before using the write command.


Command (m for help): p
Disk /dev/loop25: 14.9 GiB, 16008609792 bytes, 31266816 sectors
Units: sectors of 1 * 512 = 512 bytes
Sector size (logical/physical): 512 bytes / 512 bytes
I/O size (minimum/optimal): 512 bytes / 512 bytes
Disklabel type: dos
Disk identifier: 0x00000000

Device        Boot Start      End  Sectors  Size Id Type
/dev/loop25p1         32 31266815 31266784 14.9G  c W95 FAT32 (LBA)

Command (m for help): q

Aha! Obviously, I tried to mount the boot partition as a filesystem, and fdisk complained. This link helped me out. losetup has an option to skip over the book block. Fdisk provided me with two pieces of information – the size of a sector (512 bytes) and the start of the FAT32 partition (32). 32*512 is 16384, so I first removed the old loopback device:

losetup -d /dev/loop25

and then I re-created it:

# losetup /dev/loop25 hdimage -o 16384
# mount /dev/loop25 /tmp/mnt

Success! I asked my friend to get a new thumbdrive, and I will copy the files over. I could either copy the files using a drag and drop, or try to reproduce the entire drive using ddrescue. dd, or some other disk cloning software..

Spinrite vs ddrescue

I own a copy of Steve Gibson’s SpinRight, and I could have used this commercial program instead of ddrescue. Why did I use ddrescue?

Some people think SpinRite is only for hard drives. This isn’t quite accurate. SpinRite has multiple modes of operations. Level 2 is read-only, and level 4 does a full read/write test of the disk. Level 4 would be a terrible choice because the drive is failing, and there is a danger of causing the drive to die . The read-only option could work. But according to some of the comments Steve Gibson has made, I believe it could modify files during level 2.

But I have another concern. When I recover files from a failing drive, I never want to write to it. Instead, I want to do a read–only recovery. Some of the articles I read state that SpinRite can fill blocks with corrupted data. While I am not a forensics expert, I appreciale the approach that I never try to modify the data on a failing disk drive. If all else fails, I can still use SpinRite, or any other recovery program.

Posted in Linux, System Administration, System Engineering, Technology, Uncategorized | Tagged , , , , , , | Leave a comment

Using bash to monitor devices entering/exiting a LAN

Someone asked me for help on a scripting problem, and it seemed both simple and interesting. They had a raspberry Pi set up to control some lights, and they wanted to turn lights on and off if a set of devices entered the house (and joined the network).

While there are many ways to detect devices, such as sniffing WiFi packets, etc, in this case I used ping to check for an IP address.

To be precise, they wanted to know about several devices in an IP address range, such as what might be dynamically assigned by a home router. I wanted to respond with a script that allowed someone to react differently – such as turning a light on or off, or perhaps play a sound or whatever.

This posed an interesting problem. I’ve used AWK for keeping track of IP addresses, but I wanted something that would remember state of the network. Also I didn’t want to call ping from within an AWK script because that gets complicated.

Generally,  I tend to have one program generate a stream of data, and a second respond to the data. But I didn’t see an easy way to have ping run continuously. It’s not designed to stream data and be easy to parse.

Also – calling ping a dozen times is both inefficient and can complicate parsing, A quick search of alternatives showed the fping command, which turns out to be perfect for our needs.

I decided to use bash‘s associative arrays combined with fping. But there were a couple of surprises I discovered.

For those new to scripting, an associative array uses a string as the index to the array. So I decided to use a data structure such as

ip[192.168.1.140]="alive"

Note that the index to the array ip is the IP address, and the value is the status.

One nice feature of fping is the easy of parsing the results. There is a special flag that tests if a device is alive or not. With this flag – we can ignore error messages.

Also – fping allows the use of a file to contain a list of IP addresses. Another process can generate and/or change this file. Therefore I used the following command to generate my data:

fping -A -f /tmp/ip 2>&-

The list of IP addresses is in /tmp/ip and the string “2>&-” tells the shell to discard STDERR


As it performs several pings in parallel, the order of the IP addresses is not predictable. However, an associative array addresses this.

Another bonus of using the fping command is the output is easy to parse – each output line contains the IP address as the first word, and the status as the third word:

192.168.1.145 is alive
192.168.1.142 is alive
192.168.1.140 is unreachable
192.168.1.141 is unreachable
192.168.1.143 is unreachable
192.168.1.144 is unreachable
192.168.1.146 is unreachable

Bash can parse this easily.

I did run into a problem that puzzled me at first. I generally use code such as

fping …. | while read arg1 arg2 arg3

But this didn’t work. I mean, it worked, but not fully.  I wanted to capture the status of the devices in the array, and I forgot that when you use the pipe command, a subshell is forked off to process it, and all of the variables in this loop[ that I “remembered” were forgotten at the end of the loop. Smack Forehead!

Instead, I piped the results into a temporary file, and then read the file in the same shell. My variables remembered their values.

In this script, I use an array ip2light to map an IP address to a light. I could easily have two arrays, called ipenter, and ipexit, and these could contain shell commands to execute.

A simple modification could allow you to play trumpets when a device joined your WiFi, and a sad trombone when it leaves. True – this is by IP address. A more complicated script could keep track of unique devices via the MAC address (using arp to map the MAC address to the IP address).

So here’s the script. I hope this helps


#!/bin/bash

TMPFILE=$(mktemp)
trap "/bin/rm $TMPFIE"  0 HUP INT TERM

# let's create 2 associative arrays - this one maps 
# an IP address to a light

declare -A ip2light

ip2light[192.168.1.140]="Light0"
ip2light[192.168.1.141]="Light1"
ip2light[192.168.1.142]="Light2"
ip2light[192.168.1.143]="Light3"
ip2light[192.168.1.144]="Light4"
ip2light[192.168.1.145]="Light5"
ip2light[192.168.1.146]="Light6"


#etc


# declare another array that keeps track of each IP address


declare -A ip


# This lets us know if the device is here.

# for debug reasons, I did this once, 
# and then while it was running, I edited the temp file to test
#  the loop


#fping -A -f /tmp/ip 2>&- >$TMPFILE
while true # do this forever
      do
          # doing an fping here in a loop causes it to constantly query the machines

          fping -A -f /tmp/ip 2>&- >$TMPFILE
          while read IP x status # each line has 3 arguments - I only care about the first and third
          do
              # $IP contains IP address
              # $status contains status - either  alive or unreachable
              was=${ip[$IP]}
              if [[ "$was" != "$status" ]] # Did a device arrive or leave? Did the status change
              then
                  printf "Status of %s changed. It was '%s' and is now '%s'\n" "$IP" "$was" "$status"
                  if [[ "$status" == "alive" ]]
                  then
                    printf "Because %s arrived, turn on %s\n" "$IP" "${ip2light[$IP]}"
                  elif [[ "$status" == "unreachable" ]]
                  then
                    printf "Because %s left, turn off %s\n" "$IP" "${ip2light[$IP]}"
                  fi

              fi
              declare  ip[$IP]="$status" # remember the status
          done <$TMPFILE
          echo sleep 5 seconds
          sleep 5
done
I hope this helps someone.


Posted in Hardware Hacking, Linux, Shell Scripting | Tagged , , , , , , | 1 Comment

Installing pyftdi on Ubuntu 18.04 for FT232H and FT2232H boards

Why use  FT232H and FT2232H boards?

I wanted to use a FT232H board for some hardware hacking. The FTDI FTxxx family of devices and boards based on this chip is categorized as a Multi-Protocol Synchronous Serial Engine (MPSSE), which can be used to debug UART, I2C, SPI and JTAG devices.  I’ve used single-purpose devices, as well as the BusPirate, however there are limitations.

I like the BusPirate a lot. It’s fun to use and has many handy features. But it’s slow, and doesn’t support JTAG very well. The FT2xx family of chips do a much better job.

I have several boards that use this chip, including:

Others include:

I looked at some  libraries and software, but I wanted one that supported all the chips I have, including the  FT2232H-based TUMPA board. I also wanted to use python, a popular language for hardware hacking.

What’s the difference between the FT232H and FT2232H chips?

There are a few differences between FT232H and FT2232H boards.

  • The FT2232H supports two connections, so you can connect to two devices, or access two different protocols on the same target board. So you can access both SPI and I2C, or I2C and JTAG.
  • The FT232H has a 1KB Ring buffer, while the FT2232H has a 4KB buffer.
  • The FT2232H has 16 GPIO pins.

By the way, the FT4232H chip supports 4 channels, compared to the FT2232H’s 2 channels and the FT232H’s single channel. So think of the variations as a single, dual or quad version of the same MPSSE.

I also learned that the Shikra board was developed because the TUMPA had a “very high failure rate (they’d burn up easily or stop working inexplicably).” The Shikra does have a MOSFET circuit to limit current to the device.

Preparing Ubuntu so that your normal (non-root) account can install python-based software

Before we install the software, there are a few options:

  • Install it as root. That is, do everything as root. Besides a potential security risk, this can cause problems if you combine installing software using other package managers, you can get inconsistencies and conflicts.
  • Install the files into non-standard locations. This is more difficult to set up, and if you have other packages, you may have to deal with multiple versions and locations
  • Give yourself the ability to install software as a non-root, but privileged user. This is the directions I took.

Ubuntu uses the group staff as the group that can work with installed files. In particular,  the directory /usr/local/lib/python3.6/dist-packages belongs to group staff. However, members of the group staff do not have write permission. This can be fixed using

sudo chmod g+w /usr/local/lib/python3.6/dist-packages

Also, the executable directory /usr/local/bin belongs to group root. We need to change this to group staff and make it group writable:

sudo chgrp staff /usr/local/bin
sudo chmod g+w /usr/local/bin

There is another step – add yourself to group staff.

sudo addgroup $USER staff

However, before you can install the software, you have to log out and log in. Use the command groups(1) to make sure you are in the group.

I decided to use this method, because:

  • I can easily install and debug utilities without becoming root.
  • Any changes I make are easily located (and removed) because I own the files, and not root. If another package re-installs the files and erases changed I make can be located.

Warning: Python also installs files under $HOME/.local/lib so the above be aware of this.

Installing pyftdi

I started with a fairly clean version of Ubuntu. I downloaded the pyftdi source from the Github respository.  Note that the repository is likely more up-to-date. I had build errors untill I used the most recent version. The code uses python3, (you will get syntax errors if you use python 2) and you have to install the python setup tools if you haven’t already:

sudo apt-get install python3-setuptools

Now go to your repository and type the following:

python3 ./setup.py build
python3 ./setup.py install

That should be all you need to do. To test this, plug in the board and type

ftdi_urls.py

You should see the following two interfaces

Available interfaces:
ftdi://ftdi:2232:3:2a/1 (Dual RS232-HS)
ftdi://ftdi:2232:3:2a/2 (Dual RS232-HS)

If not, the board may have a different vendor or product

The way to check this is to do plug in the board,  and type the dmesg command and look for a string like this

New USB device found, idVendor=0403, idProduct=8a98

If this is the case, then you should add a new line to /etc/udev/rules.d/11-ftdi.rules

SUBSYSTEM=="usb", ATTR{idVendor}=="0403", ATTR{idProduct}=="8a98", GROUP="plugdev", MODE="0666"

The udev subsystem has to be restarted after this change:

udevadm control --reload-rules

However, to get pyftdi to work, I had to have to modify the source. One way to do this is to add the product ID into the source by modifying pyftdi/ftdi.py

--- ftdi.py.orig	2020-03-22 13:37:57.919150970 -0400
+++ ftdi.py	2020-03-22 10:56:17.390397876 -0400
@@ -82,6 +82,7 @@
              '2232': 0x6010,
              '2232d': 0x6010,
              '2232h': 0x6010,
+             '2232h': 0x8a98,
              '4232': 0x6011,
              '4232h': 0x6011,
              '230x': 0x6015,
@@ -93,6 +94,7 @@
              'ft2232': 0x6010,
              'ft2232d': 0x6010,
              'ft2232h': 0x6010,
+             'ft2232h': 0x8a98,
              'ft4232': 0x6011,
              'ft4232h': 0x6011,
              'ft230x': 0x6015,

Then reinstall the software as above. Be aware that you might have multiple versions of the executables, and if you execute an old one, it will not work.

However, this isn’t the approved method.

A second method is to reprogram the EEPROM and modify the product ID.

A third method it to use an option added in v0.48.3:

ftdi_urls.py -P 0x403:0x8a98

A fourth method is to add the new product ID with an API call. But that’s only needed if you are writing your own code.


Posted in Hacking, Hardware Hacking, Linux, Security | Tagged , , , , , , , , , , , , , , | Leave a comment

Bus Pirate Cables – which is the best?

One of the more useful tools for reverse engineering hardware is a Bus Pirate.

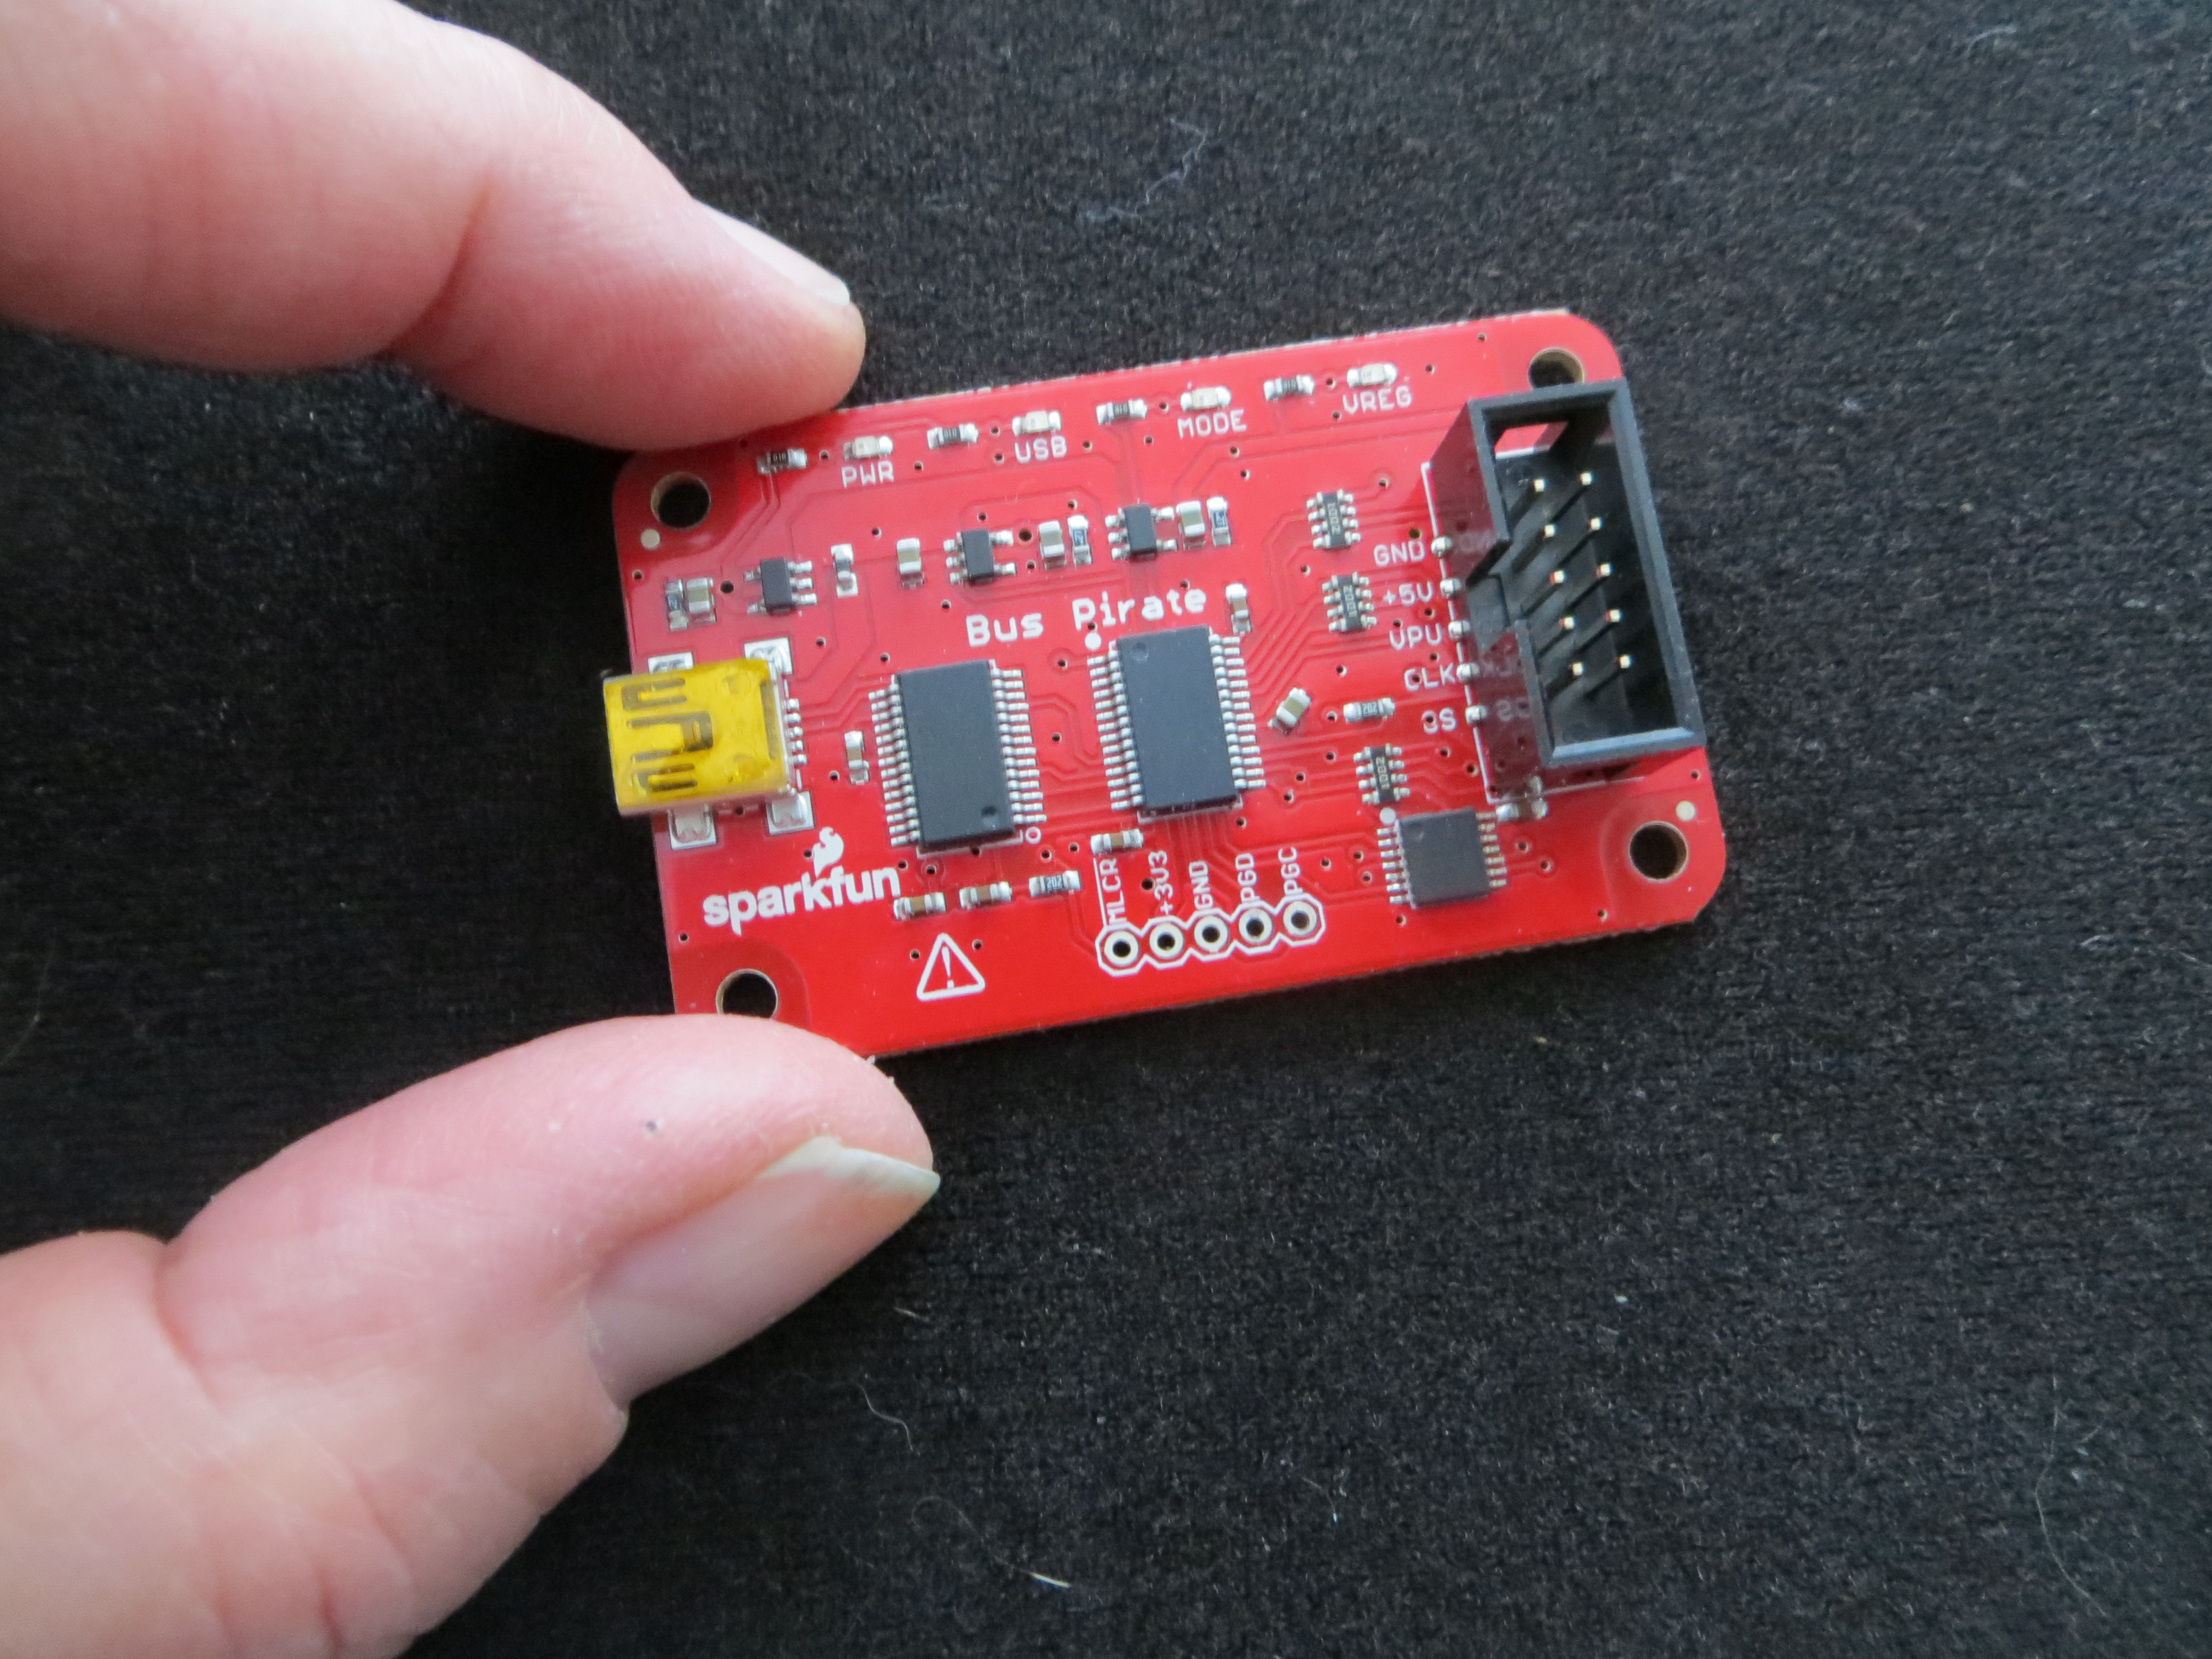
IMG_2167

However, it does not come with any sort of cable or connector. You can use DuPont connectors, if your device has headers soldered to it. However, some people find it easier to get a Bus Pirate Cable, which has several advantages:

  • The wires are color-coded, making it easier to keep track of the wires.
  • Bus Pirate connectors have a plug that fits the Bus Pirate exactly. This makes mistakes less likely.
  • Some cables have labels on the wires.
  • Some cables have test probes attached to the wires, allowing you to connect to devices that don’t have headers.
  • If you have more than one cable, you can switch between devices under test easily and quickly.
  • Bus Pirate connectors are compatible with other devices, such as the JTagulator – which can support 3 Bus Pirate cables at once. So the cables are multi-purpose.

However, there are some things you should know before you select a cable. They are not all the same.

  • First of all, most cables are for the Bus Pirate Version 3 – which is a 2×5 connector. The Version 4 Bus Pirate has a 2×6 connector. The cables are not compatible.
  • The color coding of the wires is not standardized.
  • Sometimes the test probes attached to the cable are not the ones you want to use. Some clips are too big to grab the leg of an IC.
  • Some cables have labeled wires.

I found four different Bus Pirate cables from major vendors:

  • Seeed Studio (3 types. V3 & V4, with and without test probes)
  • Adafruit (Similar to the first Seeed v3 type)
  • SparkFun (Different color code, w/test probes)
  • Dangerous Prototypes (labeled, male connectors)

There are other sources, but I listed the well-known sites above. Let me describe them.

Seeed Studio

Seeed Studio makes cables for both versions of the Bus Pirate – v3 and v4.   These have test probes attached.

There is a second version for the v3 Bus Pirate – without test probes.

The first v3 version has 8 large hook-style clips, and 2 thin grabber-style hooks, sometimes called SMD clips because the two thin prongs can grab both sides of the leg of an IC.

The color code for the Seeed cable is Seed-cable.png

This color code matches the colors shown in response to the “v” command for the BusPirate

Screenshot from 2018-01-18 09-04-46

The second V3 set has female DuPont connectors instead of test probes, The same color code is used.

The V4 has 10 large hook-style clips.

Adafruit

The Adafruit cable is very similar to the cable w/test probes from Seeed Studio

SparkFun

The SparkFun Bus Pirate cable does not have any test clips. Instead, they have female DuPont connectors – allowing you to attach them to headers or your own test probes.

The color coding is different from the Seeed Studio/Adafruit code. The colors are reversed.

Sparkfun-cable.png

Dangerous Prototypes

Dangerous Prototypes is Ian Lesnet’s web site. Ian created the Bus Pirate. He has a new store on DirtPCB’s.

The Dangerous Prototypes cable does not have any test probes. Instead, they have  a male pin, suitable for plugging into a breadboard. On the plus side – the wires are labeled. 

This is Ian’s preferred cable:

IMG_2168

In addition, you can  buy the labels separately – for only $1. I bought 3 sets of labels, and it cost me a total of $4 ($1 shipping). Trust me. It’s a bargain.

My initial recommendation

I prefer labeled cables with female DuPont connectors for several reasons:

  • You can plug them onto headers directly.
  • You can connect to breadboards by adding a header.
  • You can remove a wire from a header (or use a single-pin header) and insert it, converting the connector to a male plug.
  • You can add your own test probes, such as the E-Z Hook Test probes , or a lower cost version
  • You can change the test probes to suit the board, or make your own.
  • The cables are more compact.

Both SparkFun and Seeed Studios make female DuPont cables. The Seeed Studio version uses the “official” color code. But nether are  labeled. But that’s an easy problem to fix.

I really prefer labeled cables.  You do not need a cheat sheet to identify the function of each wire. I bought several sets of Bus Pirate labels from Dangerous Prototypes, which only cost $1, and added the labels to my female cables so they look like this:

IMG_2166

I even added labels to my cables that have test probes attached. Here is the results:

IMG_2165

I cut the labels in half to make them shorter, added then to the tip of the probe, and applied a heat gun to shrink them. Ta-Daa!

Summary

Therefore I recommend the Seeed Studio version w/female connectors  with the DIY heat shrink labels.  

But that’s my preference. If you want a cable with test probes, or male plugs, get them. But get the labels as well and add them to your cables. The cables aren’t very expensive, and getting multiple types won’t break the bank.


Posted in Hacking, Security | Tagged , , , | Leave a comment

Metasploit+Amazon SES, or debugging Sendmail’s SMTP Authentication

TL;DR: Debugging Sendmail’s SMTP AUTH option is not well documented. I integrated Metasploit Pro with Amazon’s SES/Sendmail, and this describes the debug process I used.

We have an Amazon EC2 system using SES (Simple Email Service) running Sendmail.  We use this system for phishing exercises. However, we wanted to make use of  Metasploit Pro which has  phishing features.  To do this, we have to integrate the Metasploit system with the Amazon SES (Simple Email Service), so that the Metasploit system connects to the Amazon system, crafts an email message, and the Amazon system delivers the email to the client.

As our system uses sendmail,  we have to modify it to accept incoming email using SMTP mail authentication. The documentation I found on line was not as helpful as I’d like. So I had to debug the connection to see what was happening.

You should be aware that other sites might try to connect to your mail server, and brute force the username and password. Therefore use firewall rules to limit incoming connections. You may also want to use Fail2Ban to detect brute force attempts.

Create a user account

We have to create an account that will be used to send authenticated email on the Amazon server. I executed an account for the user “metasploit” using:

useradd -d /home/metasploit -m -s /sbin/nologin metasploit

And then I created a password for this account. Let’s assume it’s “mySecret”

Install saslauthd

I installed saslauthd using

sudo yum install cyrus-sasl-gssapi cyrus-sasl-md5 cyrus-sasl cyrus-sasl-plain cyrus-sasl-devel

Then as root I enabled the saslauth daemon:

service saslauthd start
chkconfig saslauthd on

Adding the SMTP AUTH option to sendmail


As root, I edited /etc/mail/sendmail.mc by uncommenting the following lines (removing the “dnl” at the begining of the line):

TRUST_AUTH_MECH(`EXTERNAL DIGEST-MD5 CRAM-MD5 LOGIN PLAIN')dnl
define(​confAUTH_MECHANISMS', `EXTERNAL GSSAPI DIGEST-MD5 CRAM-MD5 LOGIN PLAIN')dnl

“dnl” means “Discard to the Next Line”.  The M4 macro processor supports “#” comments and “dnl”. The difference is that the text after “dnl” is not passed to the next process (sendmail in this case).
Make sure there is only one line that defines the ​confAUTH_MECHANISMS values. That’s important.

To remake the sendmail configuration file, I typed as root

cd /etc/mail
make
service sendmail restart

Verify the sendmail supports sasl

Next, verify that sendmail is compiled with the SASL option. Type

/usr/sbin/sendmail -d0.1 -bv root

which returns

Version 8.14.4
 Compiled with: DNSMAP HESIOD HES_GETMAILHOST LDAPMAP LOG MAP_REGEX
 MATCHGECOS MILTER MIME7TO8 MIME8TO7 NAMED_BIND NETINET NETINET6
 NETUNIX NEWDB NIS PIPELINING SASLv2 SCANF SOCKETMAP STARTTLS
 TCPWRAPPERS USERDB USE_LDAP_INIT

Make sure one of the options is SASLv2. If you see it, then sendmail is properly compiled.

I restarted sendmail and tested the authentication using

testsaslauthd -u metasploit -p mySecret -s smtp

and it responded with

0: OK "Success."

It should work now. So then I tried Metasploit using the setup page to test the connection.

No luck. Hmm. I needed to delve deeper into debugging the connection. It turns out that the problem wasn’t with sendmail. But I didn’t know this at the time. (Also – my colleague was responsible for the Metasploit machine. I didn’t have access to it).

Running sendmail with debug flags

I stopped sendmail with “sudo service sendmail stop”  and then started it manually with debug flags and logging

/usr/sbin/sendmail -bs -qf -v -d95 -O LogLevel=15 -bD -X /tmp/test.log &

That’s heavy sendmail fu. Let me document the flags

-bs  # STMP mode
-qf # run in foreground (do not fork a new process)
-v # verbose mode
-d95 # set debug flag 95 which deals with authentication
-O LogLevel=15 # Use option that sets log level to 15
-bD # run as mail daemon(i.e. receiving email) in the foreground
-X /tmp/test.log # log everything to a log file

Once this is done, you can test the connection by using telnet to port 25. But to do this, you need to make sure you issue the arguments correctly. This is where the documentation I found was lacking. I thought I was doing it the proper way, but I wasn’t.

Using SWAKS

There is a wonderful program called SWAKS – or Swiss Army Knife for SMTP

It’s perfect for debugging sendmail’s AUTH mechanism. I downloaded it and placed it in ~/bin and executed

~/bin/swaks --server localhost --to receiver@domain1.com --from sender@domain2.com -a LOGIN -au metasploit -ap mySecret

The important option is the “-a LOGIN” as it specifies the AUTH mechanism to use. If it works, SWAKS’ crafted email will be transmitted to sendmail, which will deliver it.

If you examine the log file, you can see what happens.  Here is the important lesson:

Using swaks with the proper sendmail debug flags will help you debug STMP AUTH.

Here is a sample output from the log file

08256 >>> 220 myhost.org ESMTP Sendmail 8.14.4/8.14.4; Mon, 4 Dec 2017 14:58:17 GMT
08256 <<< EHLO localhost^M
08256 >>> 250-myhost.org Hello senderhost.com [x.x.x.x], pleased to meet you
08256 >>> 250-ENHANCEDSTATUSCODES
08256 >>> 250-PIPELINING
08256 >>> 250-8BITMIME
08256 >>> 250-SIZE
08256 >>> 250-DSN
08256 >>> 250-ETRN
08256 >>> 250-AUTH LOGIN PLAIN
08256 >>> 250-DELIVERBY
08256 >>> 250 HELP
08256 <<< AUTH LOGIN^M
08256 >>> 334 VXNlcm5hbWU6
08256 <<< bWV0YXNwbG9pdA==^M
08256 >>> 334 UGFzc3dvcmQ6
08256 <<< bXlTZWNyZXQ=^M
08256 >>> 235 2.0.0 OK Authenticated
08256 <<< MAIL FROM:<sender@domain2.com>^M
08256 >>> 250 2.1.0 <sender@domain2.com>... Sender ok
08256 <<< RCPT TO:<reciever@domain1.com>^M
08256 >>> 250 2.1.5 <receiver@domain1.com>... Recipient ok
08256 <<< DATA^M
08256 >>> 354 Enter mail, end with "." on a line by itself
08256 <<< Date: Mon, 04 Dec 2017 09:58:16 -0500^M
08256 <<< To: receiver@domain1.com^M
08256 <<< From: sender@domain2.com^M
08256 <<< Subject: test Mon, 04 Dec 2017 09:58:16 -0500^M
08256 <<< Message-Id: <20171204095816.008191@localhost>^M
08256 <<< X-Mailer: swaks v20170101.0 jetmore.org/john/code/swaks/^M
08256 <<< ^M
08256 <<< This is a test mailing^M
08256 <<< ^M
08256 <<< .^M


If you are trying to debug the connection, especially using “telnet localhost 25”,  and it’s not working, you have to be able to decode and parse the strange arguments, such as “UGFzc3dvcmQ6″. This is easy once you know how. The data is simply base64. You can decode these arguments using some simple shell commands:

# printf "VXNlcm5hbWU6" | base64 -d | od -c
0000000 U s e r n a m e :
000001

If we decode all of the arguments, the above becomes

08256 <<< AUTH LOGIN^M
08256 >>> 334 Username:
08256 <<< metasploit^M
08256 >>> 334 Password:
08256 <<< mySecret^M

That’s the sequence of commands for the LOGIN authentication. But there are other options. For example, there is the “PLAIN” format – which is also supported by Metasploit. If you look at the log file about, sendmail identifies the type of authentication it supports when it replies “250-AUTH LOGIN PLAIN”. Let me demonstrate the “PLAIN” format.

I didn’t mention this earlier, but when you use swaks, it also outputs the arguments to STDOUT. Let’s use this instead of looking at the log file.

~/bin/swaks --server localhost --to receiver@localhost --from sender@localhos\
t -a PLAIN -au metasploit -ap mySecret
=== Trying localhost:25...
=== Connected to localhost.
<- 220 host.com ESMTP Sendmail 8.14.4/8.14.4; Wed, 17 Jan 2018 18:50:07 GMT
 -> EHLO host.com
<- 250-host.com Hello host.com [127.0.0.1], pleased to meet you
<- 250-ENHANCEDSTATUSCODES
<- 250-PIPELINING
<- 250-8BITMIME
<- 250-SIZE
<- 250-DSN
<- 250-ETRN
<- 250-AUTH LOGIN PLAIN
<- 250-DELIVERBY
<- 250 HELP
 -> AUTH PLAIN AG1ldGFzcGxvaXQAbXlTZWNyZXQ= 
<- 235 2.0.0 OK Authenticated
 -> MAIL FROM:<sender@localhost>
<- 250 2.1.0 <sender@localhost>... Sender ok
 -> RCPT TO:<user@localhost>
<- 250 2.1.5 <user@localhost>... Recipient ok
 -> DATA
<- 354 Enter mail, end with "." on a line by itself
 -> Date: Wed, 17 Jan 2018 13:50:07 -0500
 -> To: user@localhost
 -> From: sender@localhost
 -> Subject: test Wed, 17 Jan 2018 13:50:07 -0500
 -> Message-Id: <20180117135007.016517@host.com>
 -> X-Mailer: swaks v20170101.0 jetmore.org/john/code/swaks/
 ->
 -> This is a test mailing
 ->
 -> .
<** 050 <user@localhost>... Connecting to local...
 -> QUIT
<** 050 <user@localhost>... Sent
=== Connection closed with remote host.

you will notice that the arguments are different. Instead of using

AUTH LOGIN

and then answering the username nad password individually, it sends a single line of information:

AUTH PLAIN AG1ldGFzcGxvaXQAbXlTZWNyZXQ=

This is also base64 format. Let’s decode it:

# printf "AG1ldGFzcGxvaXQAbXlTZWNyZXQ=" | base64 -d | od -c
0000000 \0 m e t a s p l o i t \0 m y S e
0000020 c r e t
0000024

This is what I was doing wrong. Notice that the username and password are combined, but a null character is before each one. Therefore if you want to construct the proper argument for the AUTH PLAIN, one way to do this is to use the following shell commands (where the username  is “metasploit” and the password is “mySecret”):

printf "\000%s\000%s" metasploit mySecret|base64

So that’s how you debug sendmail’s SMTP AUTH option.

Getting it to work with Metasploit

Here’s the kicker – when you use the Metasploit setup/test mechanism to test the AUTH connection. it fails. But if you just type in the username, password, and authentication mechanism, it works!

In any case, I have provided enough information for you to debug SMTP AUTH connections. I hope you will find it useful.


Posted in Hacking, Linux, Security, System Administration | Tagged , , , , , , , , , | Leave a comment

LetsEncrypt + Amazon EC2 = SSLLabs A Rating

I wanted to easily add web security to a static AWS EC2 website to improve the search rankings. I found a guide by Ivo Petkov however there were a few problems with his instructions.

I followed his advice:

sudo yum install python27-devel git
mkdir ~/Src/letsencrypt
cd ~/Src/letsencrypt
git clone https://github.com/letsencrypt/letsencrypt
./letsencrypt-auto --debug

1st Problem

This error was reported

./letsencrypt-auto: line 654: virtualenv: command not found

I checked and found this was a python package that wasn’t installed. So I used pip, but that wasn’t installed. So..

sudo yum install python34
cd ~/Src
curl -O https://bootstrap.pypa.io/get-pip.py
python3 get-pip.py --user

I added  ~/.local/bin to my searchpath by editing ~/.bash_profile

Then before I added the package, I typed

chgrp wheel /usr/local/lib/python3.4/site-packages/
chmod g+w /usr/local/lib/python3.4/site-packages/
pip install virtualenv

Still, when I repeated the letsencrypt command, I got the same error. Let’s make sure virtualenv is installed. Aha! I found /usr/bin/virtualenv-2.7. So I typed the following to make virtualenv point to the real location

cd /usr/bin
sudo ln -s virtualenv-2.7 virtualenv

I then repeated the command

./letsencrypt-auto --debug

and it works. I had to give the real name of the machine. That is, I had to say “www.example.com” instead of “example.com”. I also had to answer some questions, and I took the suggested responses. So I next typed, as Ivo suggested, the following to use a larger key

echo "rsa-key-size = 4096" >> /etc/letsencrypt/config.ini 
echo "email = email@example.com" >> /etc/letsencrypt/config.ini

I repeated the above letsencrypt –debug command, and it warned me about doing to many of these cert requests. Okay. Let’s make sure the renew works.

I wrote a simple script for cron, which I called ~/Cron/Renew

#!/bin/sh
PATH=/usr/local/bin:/bin:/usr/bin:/usr/local/sbin:/usr/sbin:/sbin:/opt/aws/bin:/home/ec2-user/bin:/opt/aws/bin:/home/myusername/.local/bin
export PATH
$HOME/Src/letsencrypt/letsencrypt-auto renew --config /etc/letsencrypt/config.ini --agree-tos >>$HOME/Cron/renew.log 2>&1
sudo apachectl graceful >>$HOME/Cron/renew.log 2>&1


I tested this by executing it. Looks good. Notice that when I executed letsencrypt  on the EC2 instance, and I didn’t use –debug, it would not let me proceed. But once it was set up, and I am just renewing the cert, the –debug option isn’t needed.

I next added a line to my crontab to renew once a month.

33 7 1 * * /home/myusername/Cron/Renew

Changing my score from F to A

After getting this all checked, I discovered that letsencrypt already had https running on my apache server. Excellent. So I went to ssllabs and checked my score. Not good..

While my current score was B, it said next month I’d get an F. There was support for RC4 and other weak crypto.  But this is where EFF’s advice is better than Ivo’s.

I looked at the file

/etc/letsencrypt/options-ssl-apache.conf

and copy these values to  the appropriate place in Apache’s config file

/etc/httpd/conf.d/ssl.conf

I then executed “apachectl graceful”, and went to ssllabs, and tested my server. I had an A

Excellent. Thanks Ivo and EFF.


Posted in Linux, Security, Shell Scripting, System Administration, System Engineering, Uncategorized, Web Security | Tagged , , , , , , , | Leave a comment

Building a Teensy 3.2 w/SD and 8 position DIP switch + Reset button

I’ve always wanted to build a versatile Teensy-based device for use in physical security penetration testing. I’ve seen Irongeek’s device, and Mike Czumak’s dongle,  but neither of these had an SD card, and only had a 4 of 5 position DIP switch. I liked the capability of Kautilya  but it didn’t seem to use a dynamic payload using DIp switches. I didn’t want to have to re-program the device if a payload didn’t work. Also I had just received a Teensy 3.6 with a MB of flash (The Teensy 3.2 only has 256KB).  I wanted to have more flexibility, so I ordered several 4-position DIP switches, and a WIZ820+SD card adaptor. I followed directions and attached the adapter to the Teensy 3.2 to get this:

img_1784

I wanted to leave the top alone, in case I decided to add Ethernet to it. So how do I attach an 8-position DIP switch? Hmm. I knew I had to avoid using the  4,9,10,11,12,13 pins. I pondered this a bit, and stared at the bottom of the Teensy 3.2 for a while:

card7b_rev1

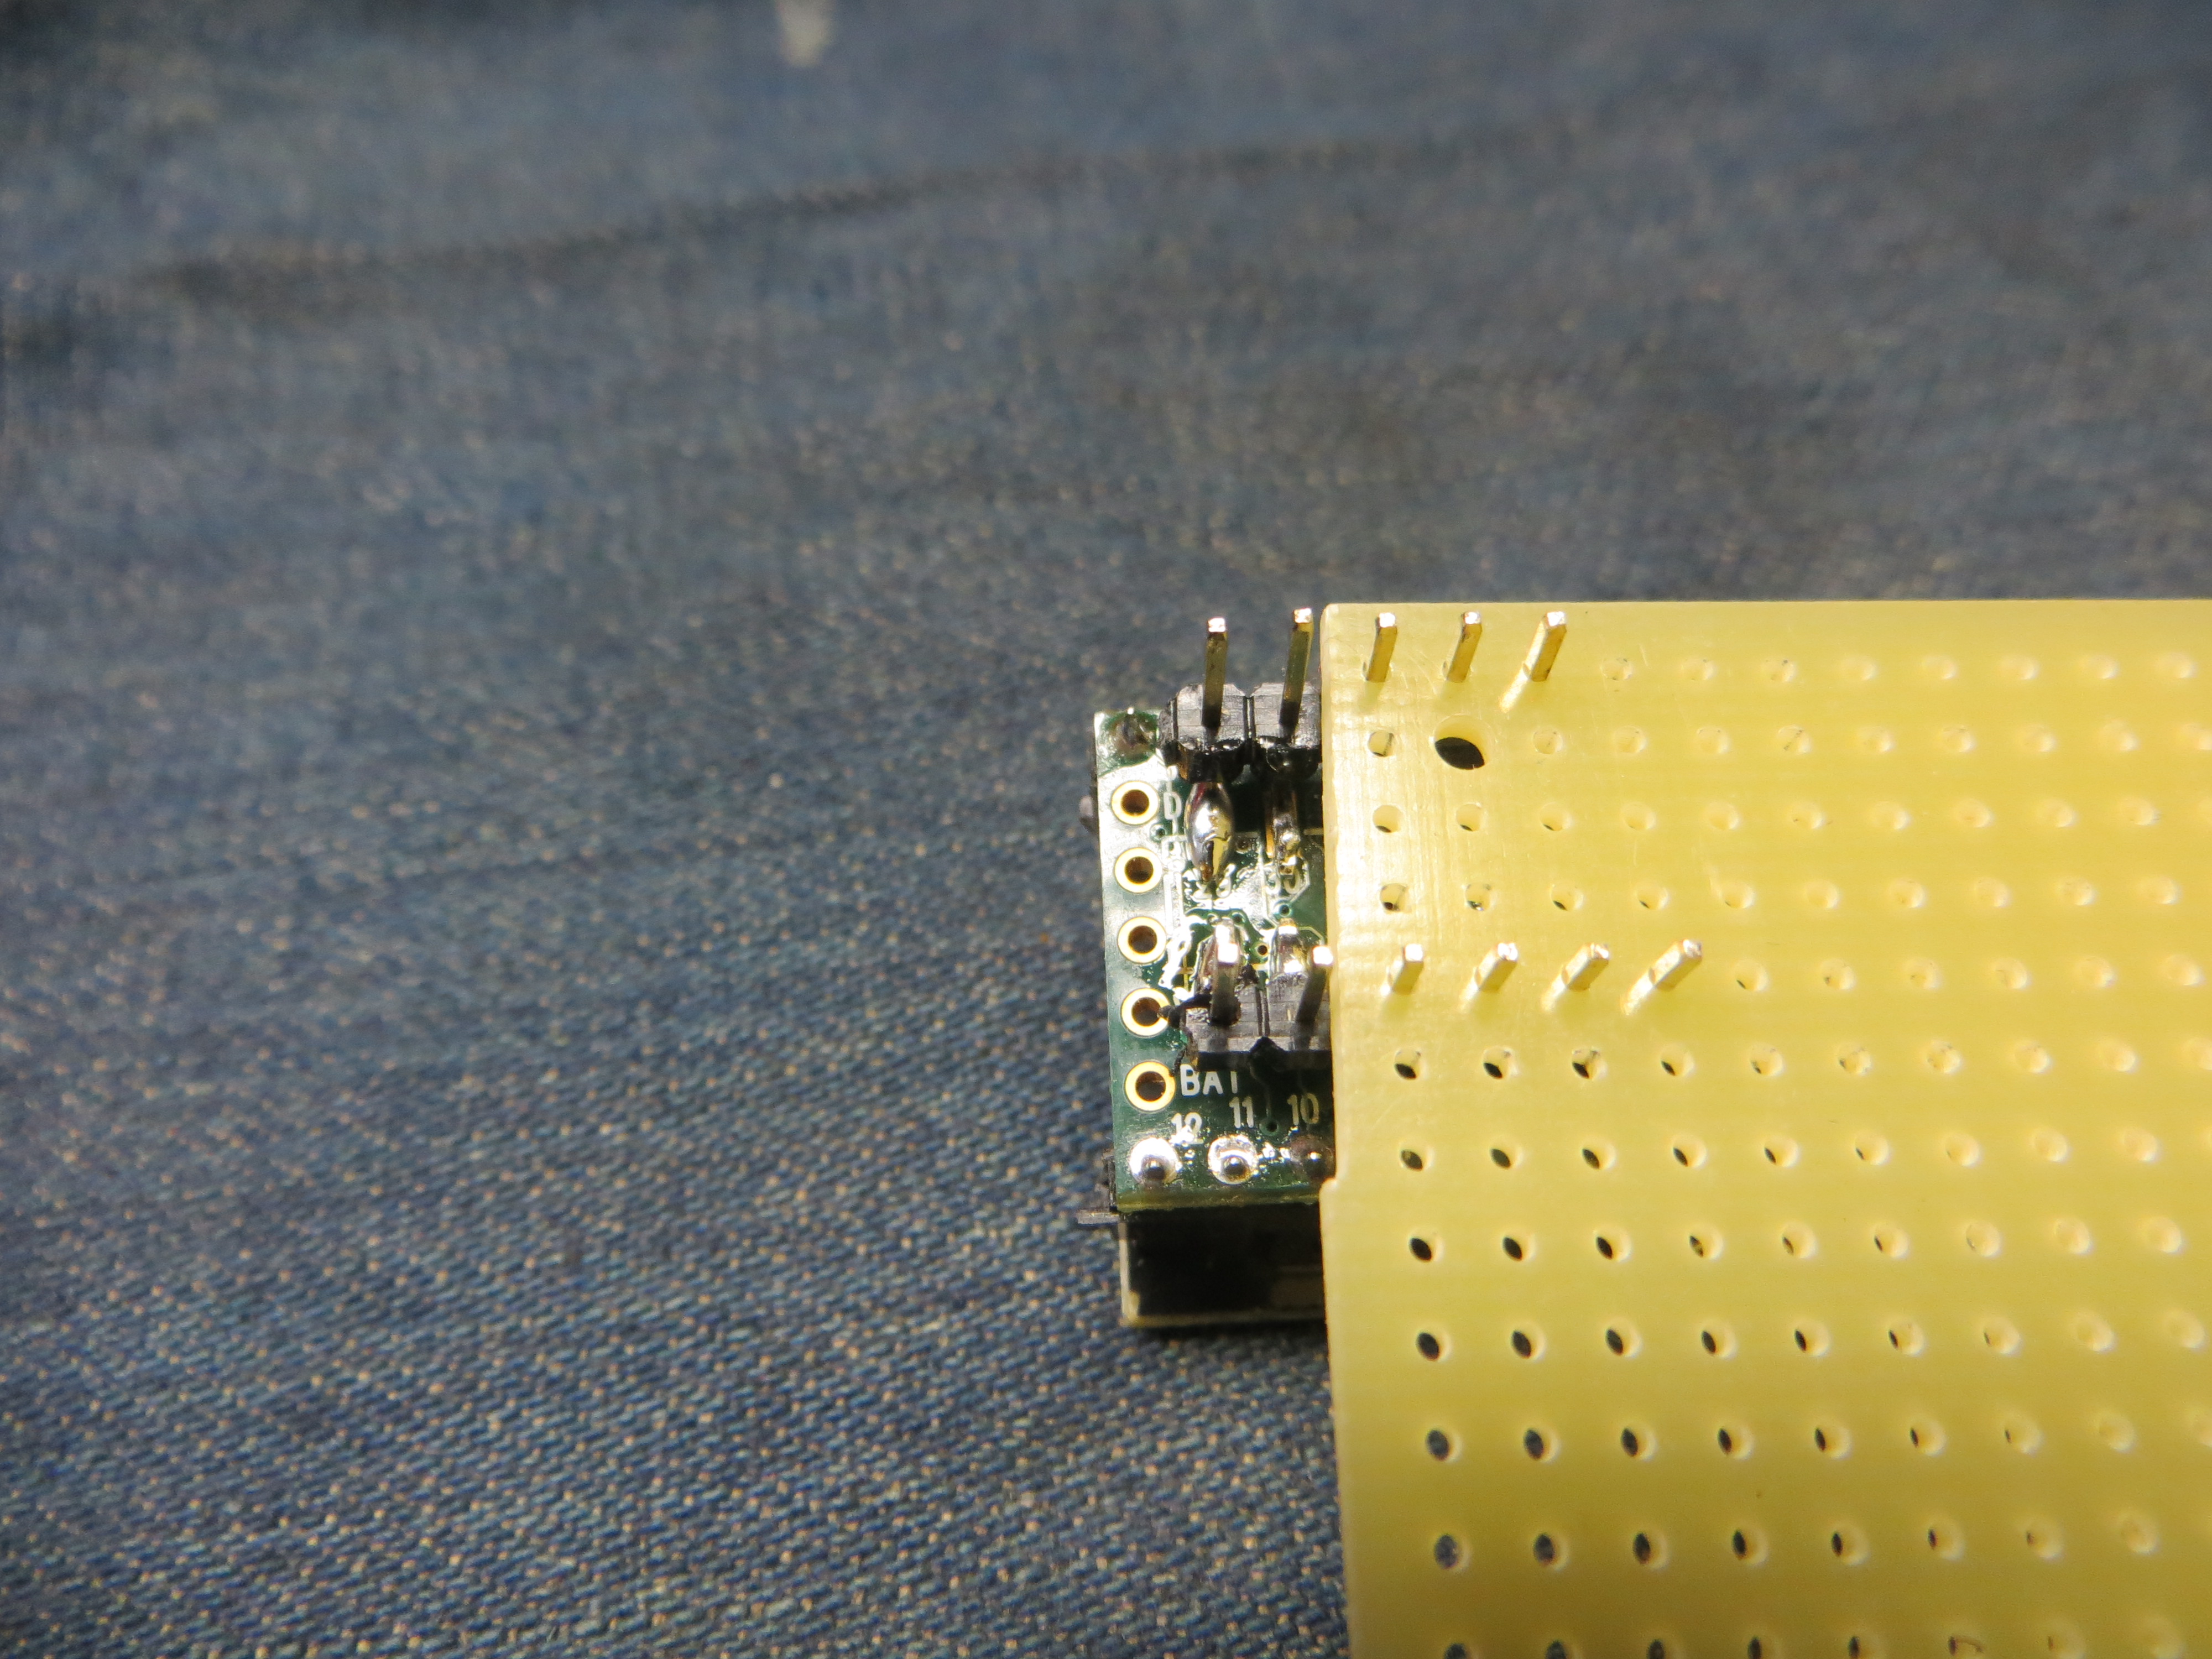
Those pads in the middle of the board looked like they would work. But how do I attach the DIP switches? I had some perfboard and some right-angle headers. So with a little bit of thinking, I had a plan. I first cut a 6-piece header, and a 5-piece header. Then I used some perfboard to hold the headers into position, and I soldered one end:

img_1772

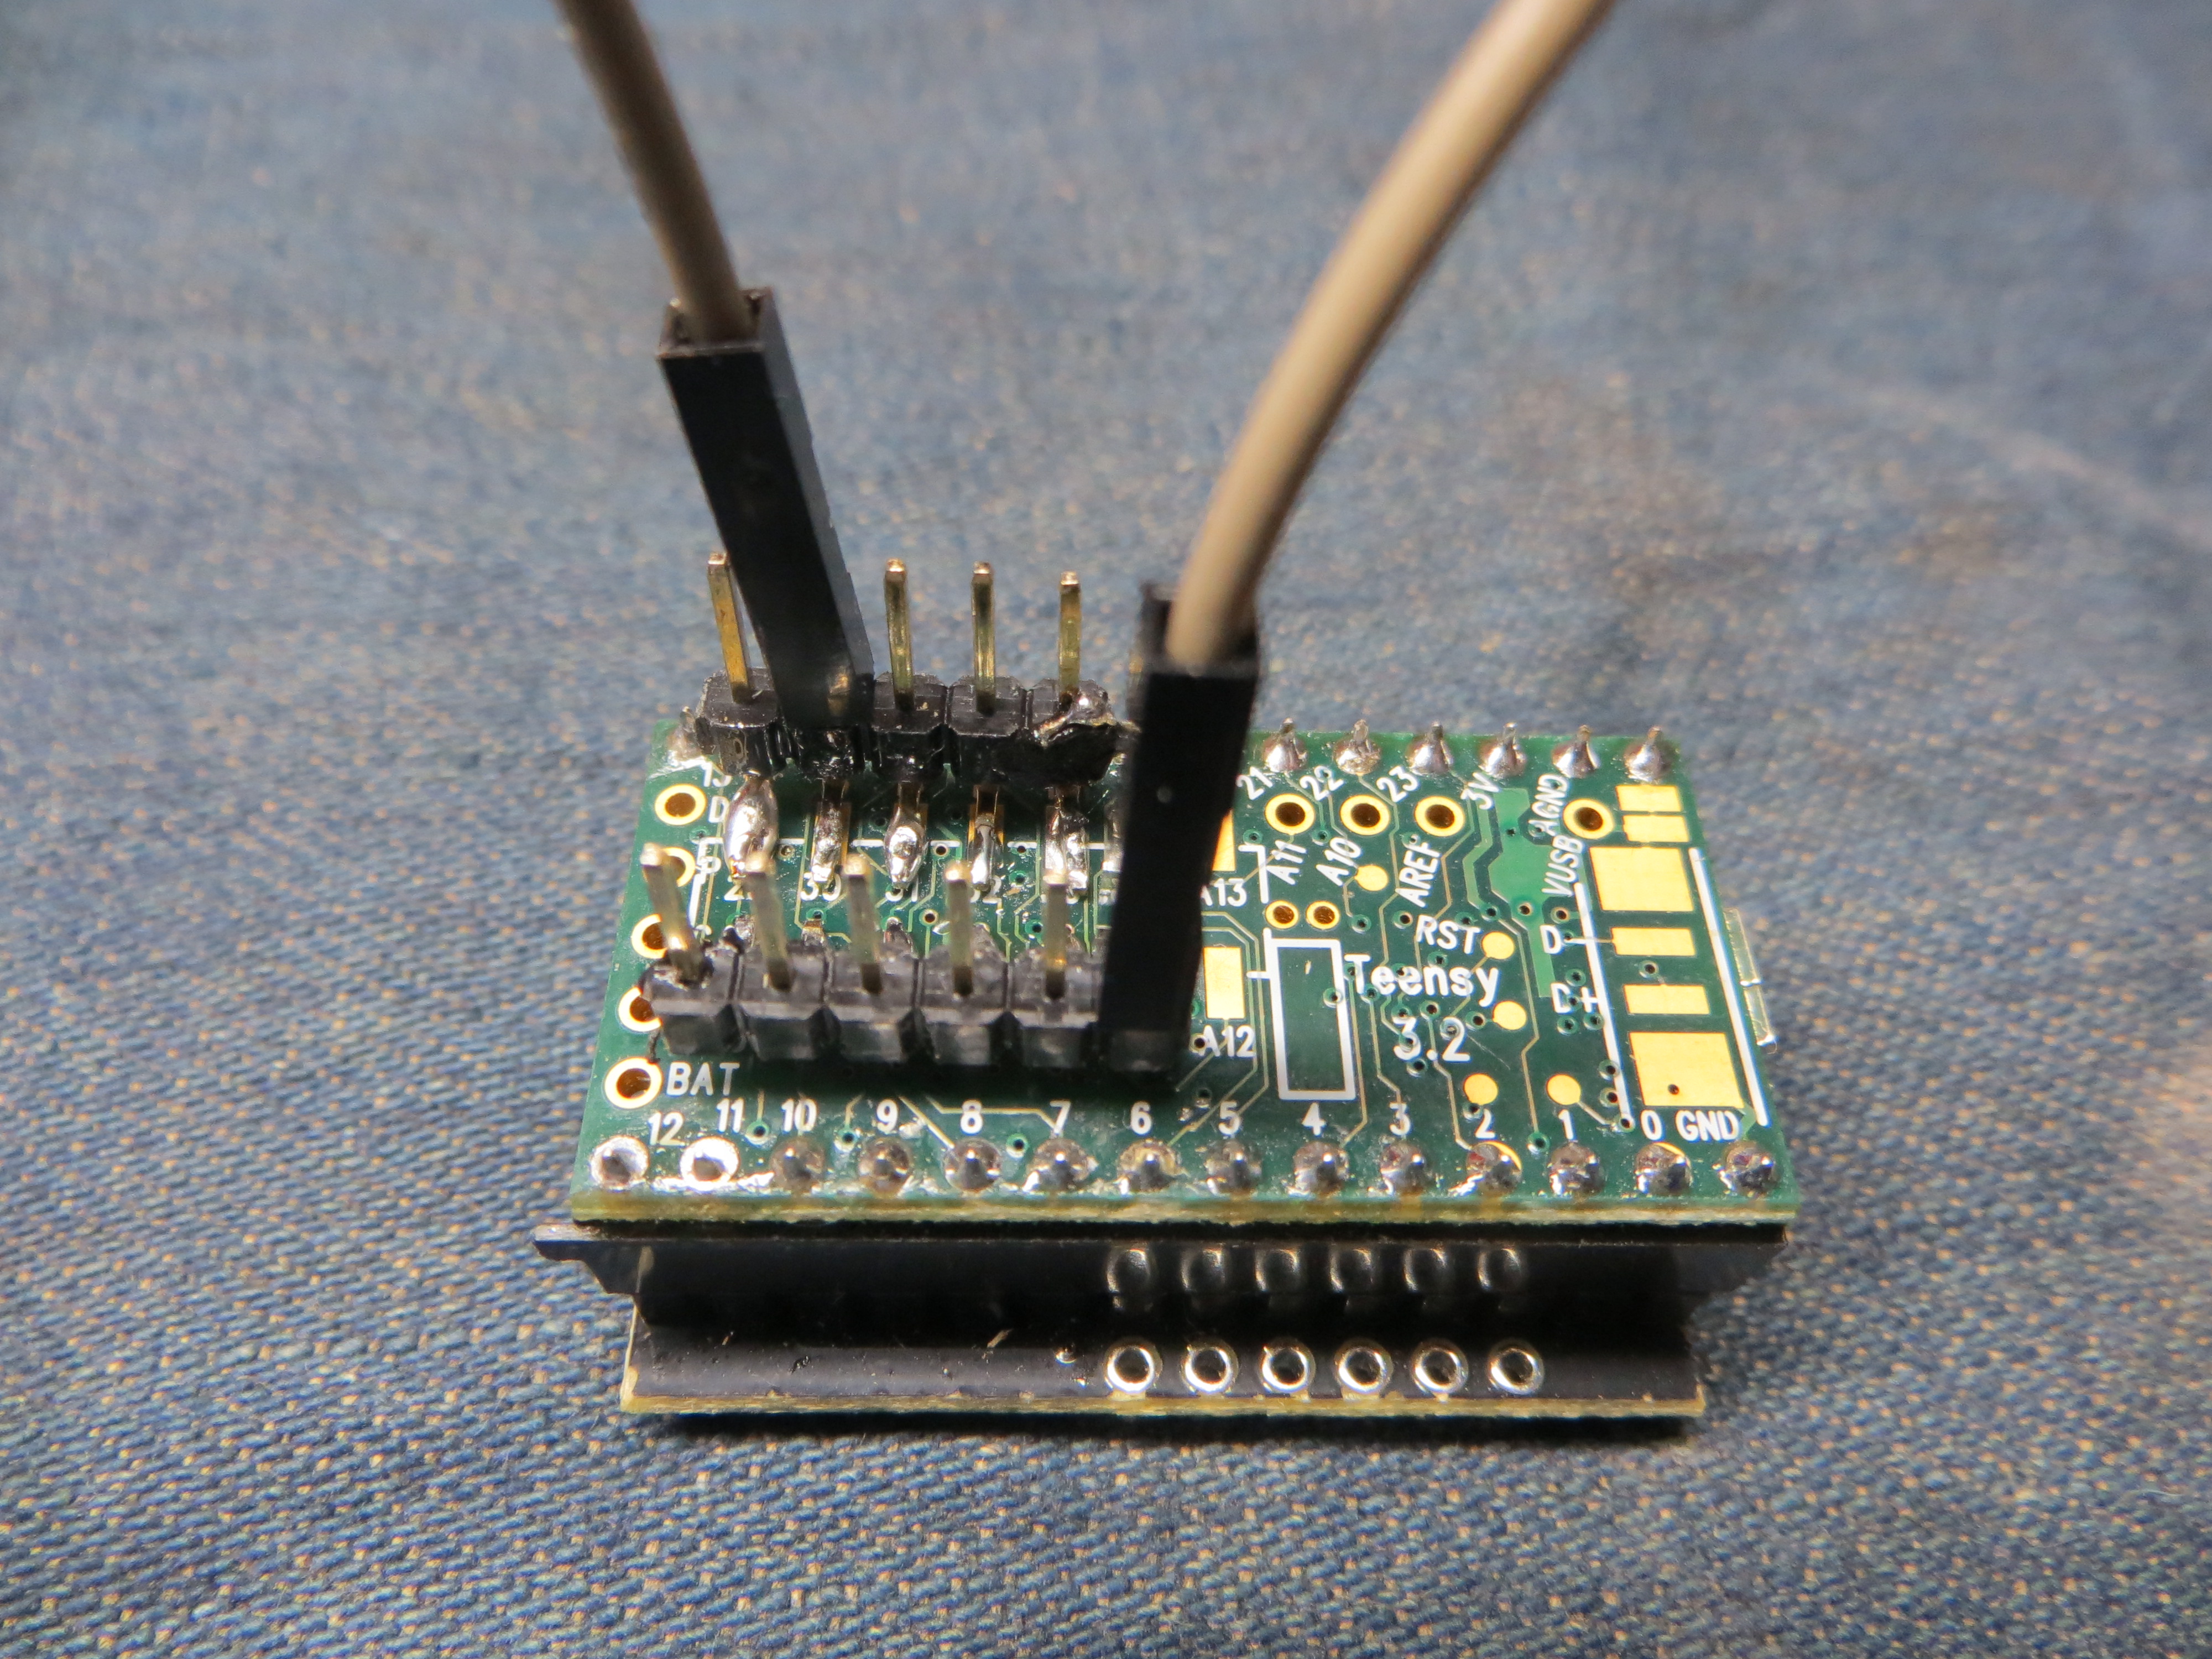
I repeated this for the other end. Now I had some headers attached to digital pins 24-33 and ground. I then tested the headers for connectivity with my test program, using a female-to-female jumper:

img_1770

Once I knew these were solidly connected I could proceed. I first planed to just have 2 4-position DIP switches, but I thought that it would be more convenient if I added a reset button. So I first did a dry-run layout of the pieces on the perfboard:

img_1774

The hookup wire I had was 20-gauge solid wire (I prefer solid for electronics that doesn’t move), and frankly the wire w/insulation was thicker than I wanted. It made the assembly tight. I also had to drill some larger holes in the perfboard so the wires would pass-through. But in the end it worked. I first attached the reset button:

img_1775

I attached the DIP switches, and connected all of them on one side (to be connected to ground) . These are the bottom pins in this diagram:

img_1779

I attached one side of the reset button to the ground side of the board. The other pin was going to be attached to the tiny reset bad on the bottom of the board. This posed a problem because this wire had to be flexible. I cannibalized a wire from a breadboard jumper wire, attached it from the switch to the reset pad, with some heat shrink  on the connection:

img_1781

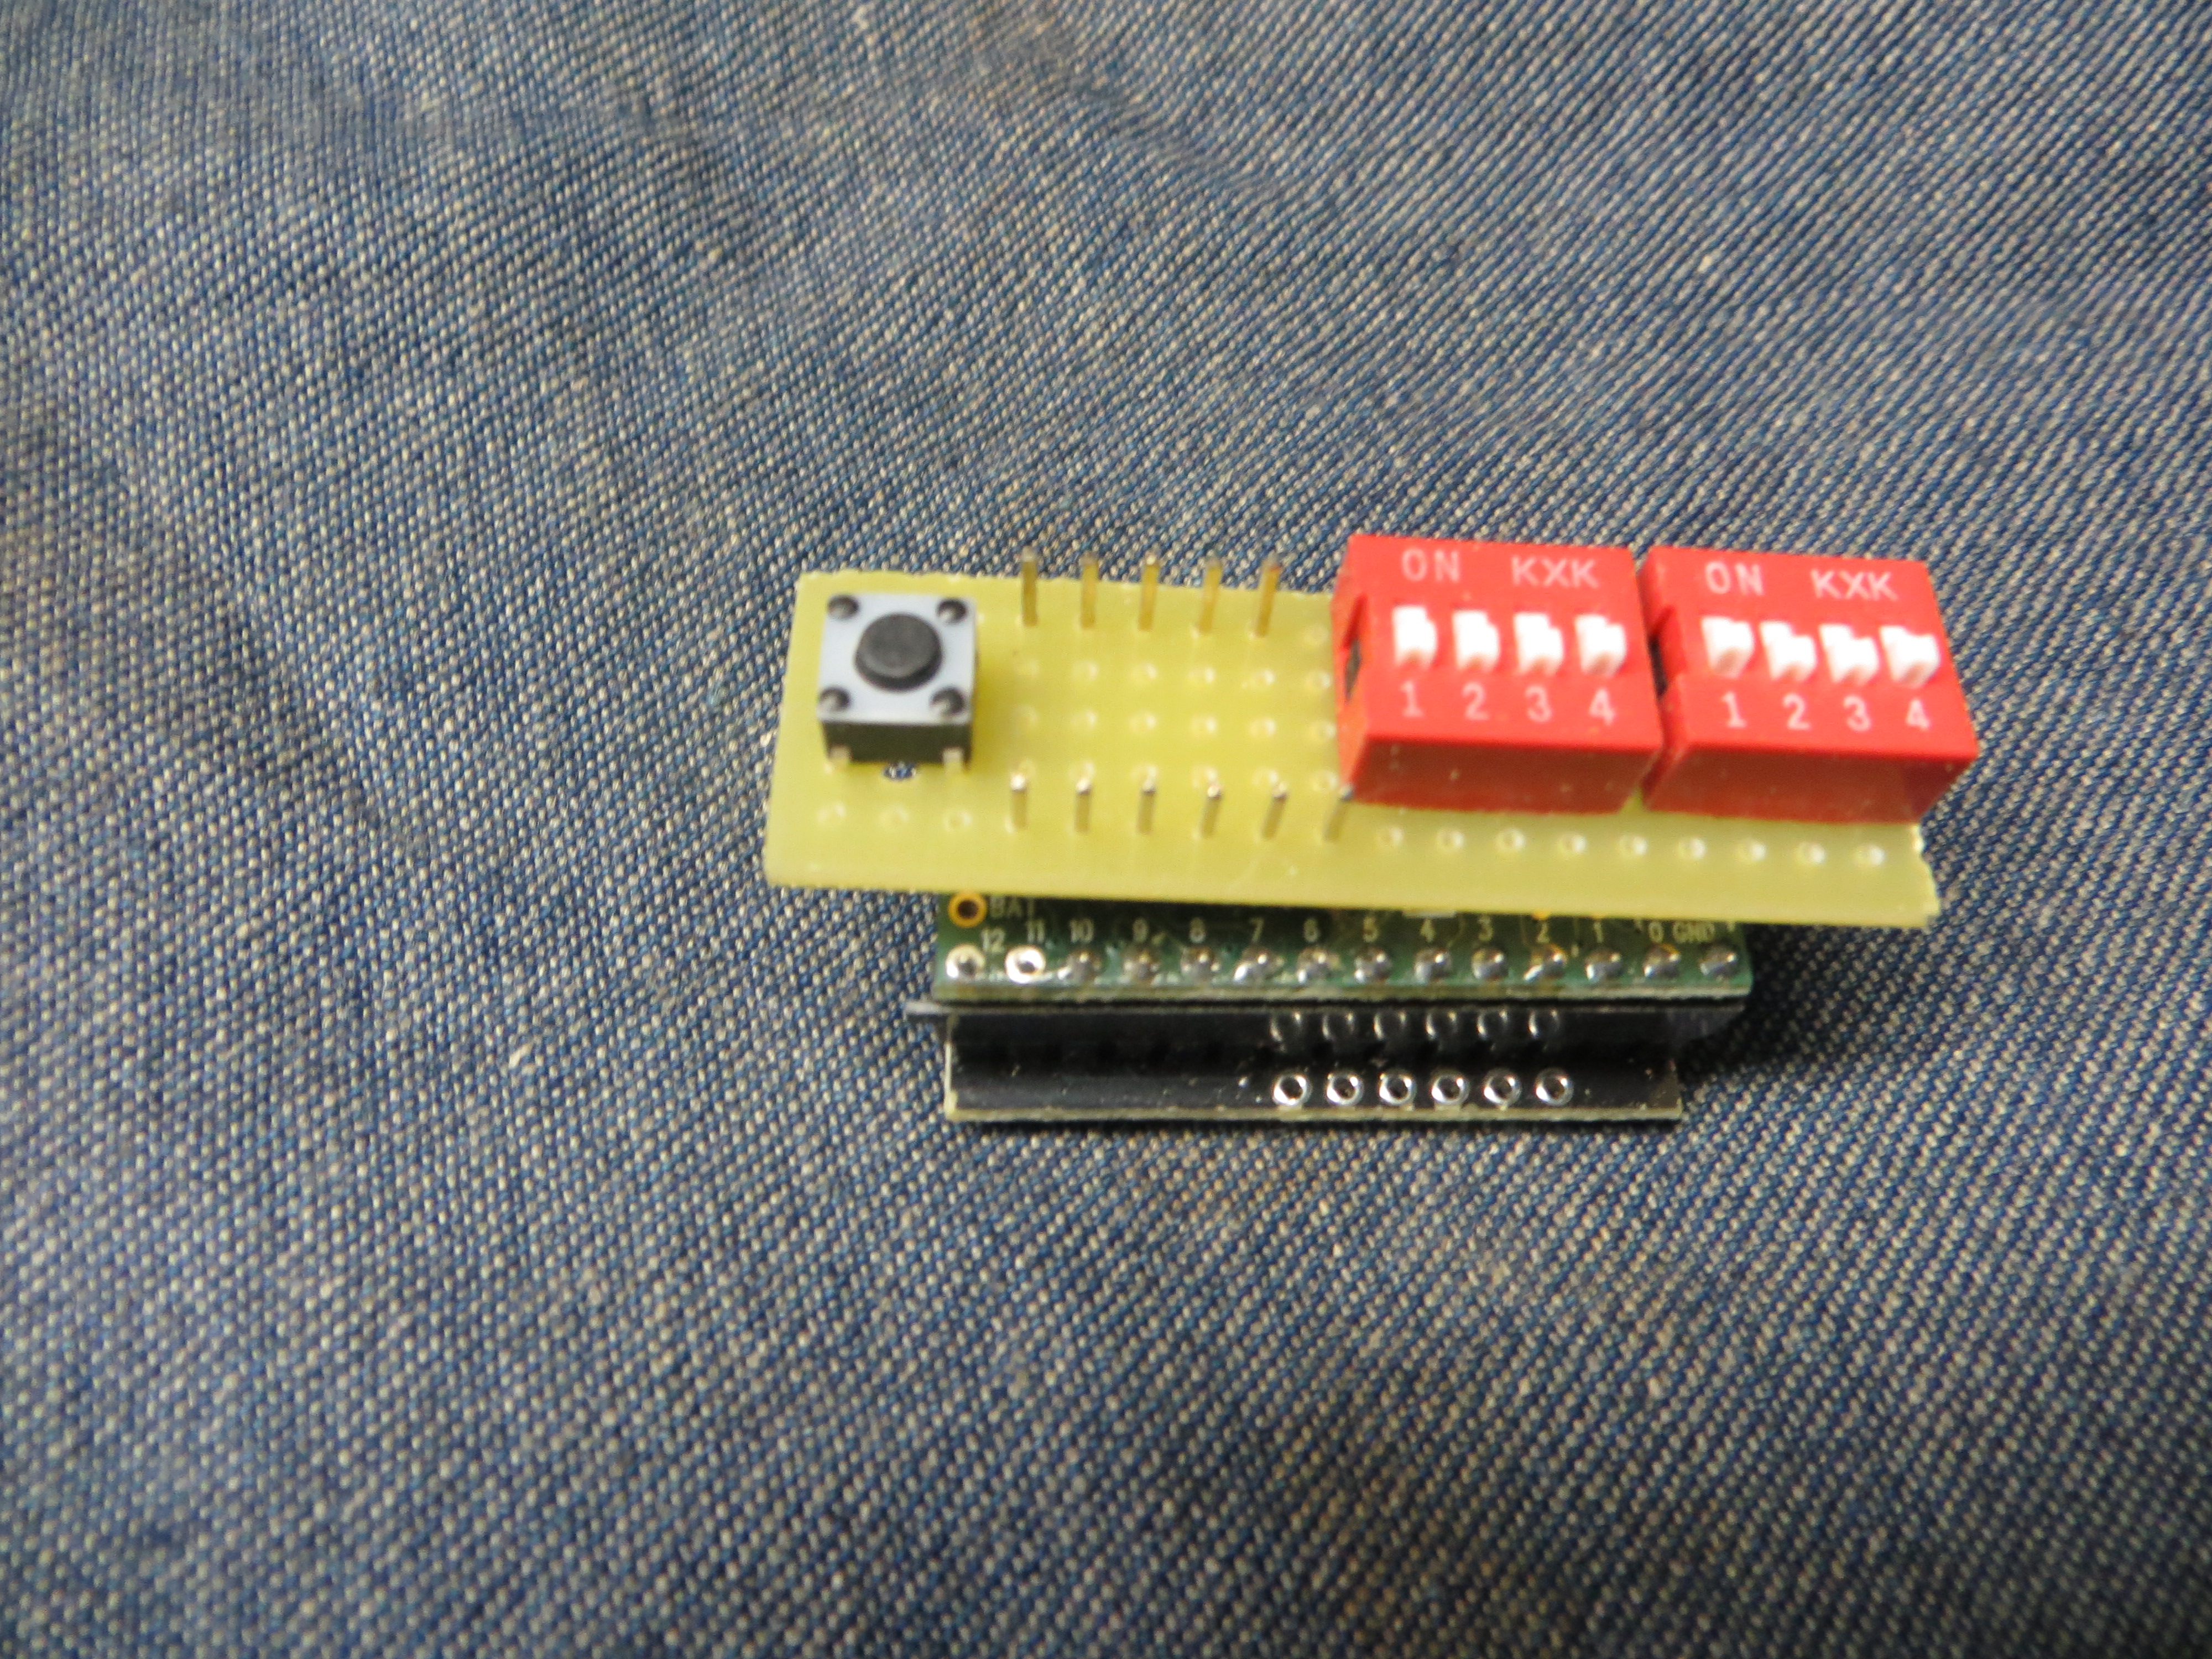
I zapped the heatshrink, and assembled the two boards. I soldered the wires to the headers, and connected the ground pin header to the ground wire on the perfboard. It’s not quite as snug as I’d like and you can see it doesn’t quite lay flat. Next time I need some 22-gauge hookup wire. That would make the assembly easier.

img_1783

I used the following Arduino program to test everything a second time.

const unsigned int dip1 = 24;
const unsigned int dip2 = 25;
const unsigned int dip3 = 26;
const unsigned int dip4 = 27;
const unsigned int dip5 = 28;
const unsigned int dip6 = 29;
const unsigned int dip7 = 30;
const unsigned int dip8 = 31;
const unsigned int dip9 = 32;
const unsigned int dip10 = 33;

unsigned int dips = 0;

void initDip(void) {
    pinMode(dip1, INPUT_PULLUP);
    pinMode(dip2, INPUT_PULLUP);
    pinMode(dip3, INPUT_PULLUP);
    pinMode(dip4, INPUT_PULLUP);
    pinMode(dip5, INPUT_PULLUP);
    pinMode(dip6, INPUT_PULLUP);
    pinMode(dip7, INPUT_PULLUP);
    pinMode(dip8, INPUT_PULLUP);
    pinMode(dip9, INPUT_PULLUP);
    pinMode(dip10, INPUT_PULLUP);

}
void setup(void) {
    Serial.begin(9600);
    initDip();
}

void loop(void) {
  dips=0;
  delay(500);

  !digitalReadFast(dip1) && (dips+=1);
  !digitalReadFast(dip2) && (dips+=2);
  !digitalReadFast(dip3) && (dips+=4);
  !digitalReadFast(dip4) && (dips+=8);
  !digitalReadFast(dip5) && (dips+=16);
  !digitalReadFast(dip6) && (dips+=32);
  !digitalReadFast(dip7) && (dips+=64);
  !digitalReadFast(dip8) && (dips+=128);
  !digitalReadFast(dip9) && (dips+=256);
  !digitalReadFast(dip10) && (dips+=512);

  if (dips>0) {
     Keyboard.print("dips: ");
     Keyboard.println(dips);
   }
}

Now I can have up to 256 different payloads – assuming they can fit on the chip + SD card. So let’s see how this goes. If I run out of flash, I could try to do the same thing for the Teensy 3.6 chip. And there are many ways to optimize the memory usage of the chip with an external SD card.

Posted in Hacking, Linux, Security | Tagged , , , | Leave a comment

Scanning for confidential information on external web servers

One of my clients wanted us to scan their web servers for confidential information. This was going to be done both from the Internet, and from an internal intranet location (between cooperative but separate organizations). In particular they were concerned about social security numbers and credit cards being exposed, and wanted us to double-check their servers. These were large Class B network.

I wanted to do something like the Unix “grep”, and search for regular expressions on their web pages. It would be easier if I could log onto the server and get direct access to the file system. But that’s not what the customer wanted.

I looked at a lot of utilities that I could run on my Kali machine. I looked at several tools. It didn’t look hopeful at first. This is what I came up with, using Kali and shell scripts.  I hope it helps others. And if someone finds a better way, please let me know,


Start with Nmap

As I had an entire network to scan, I started with nmap to discover hosts.

NMAP-GREP to the rescue

By chance nmap 7.0 was released that day, and I was using it to map out the network I was testing. I downloaded the new version, and noticed it had the http-grep script. This looked perfect, as it had social security numbers and credit card numbers built in! When I first tried it there was a bug. I tweeted about it and in hours Daniel “bonsaiviking” Miller  fixed it. He’s just an awesome guy.

Anyhow, here is the command I used to check the web servers:

NETWORK="10.10.0.0/24"
nmap -vv -p T:80,443  $NETWORK --script \
http-grep --script-args \
'http-grep.builtins, http-grep.maxpagecount=-1, http-grep.maxdepth=-1 '

By using ‘http-grep.builtins’ – I could search fo all of the types of confidential information http-grep understood. And by setting maxpagecount and maxdepth to -1, I turned off the limits. It outputs something like:

Nmap scan report for example.com (10.10.1.2)
Host is up, received syn-ack ttl 45 (0.047s latency).
Scanned at 2015-10-25 10:21:56 EST for 741s
PORT STATE SERVICE REASON
80/tcp open http syn-ack ttl 45
| http-grep:
| (1) http://example.com/help/data.htm:
|   (1) email:
|     + contactus@example.com
|   (2) phone:
|     + 555-1212

Excellent! Just what I need. A simple grep of the output for ‘ssn:’ would show me any social security numbers (I had tested it on another web server to make sure it worked.) It’ always a good idea to not put too much faith in your tools.

I first used nmap to identify the hosts, and then I iterated through each host, and did a separate scan for each host, storing the outputs in separate files. So my script was  little different. I ended up with a file that contained the URL’s of the top web page of the servers (e.g. http://www.example.com, https://blog.example.com, etc.) So the basic loop would be something like

while IFS= read url
do
    nmap [arguments....] "$url"
done <list_of_urls.txt

Later on, I used wget instead of nmap, but I’m getting ahead of myself.

Problem #1:  limiting scanning to a specific time of day

We had to perform all actions during a specific time window, so I wanted to be able to break this into smaller steps, allowing me to quit and restart.  I first identified the hosts, and scanned each one separately, in a loop. I also added a double-check to ensure that I didn’t scan past 3PM (as per our client’s request, and that I didn’t fill up the disk. So I added this check in the middle of my loop

LIMIT=5 # always keep 5% of the disk free
HOUR=$(date "+%H") # Get hour in 0..24 format 
AVAIL=$(df . | awk '/dev/ {print $5}'|tr -d '%') # get the available disk space 
if [ "$AVAIL" -lt "$LIMIT" ] 
then 
        echo "Out of space. I have $AVAIL and I need $LIMIT" 
        exit 
fi 
if [ "$HOUR" -ge 15 ] # 3PM or 12 + 3 == 15 
then 
        echo "After 3 PM - Abort"
        exit 
fi

Problem #2:  Scanning non-text files.

The second problem I had is that a lot of the files on the server were PDF files, Excel spreadsheets, etc. using the http-grep would not help me, as it doesn’t know how to examine non-ASCII files. I therefore needed to mirror the servers.

Creating a mirror of a web site

I needed to find and download all of the files on a list of web servers. After searching for some tools to use, I decided to use wget. To be honest – I wasn’t happy with the choice, but it seemed to be the best choice.

I used wget’s  mirror (-m) option. I also disabled certificate checking (Some servers were using internal certificate an internal network. I also used the –continue command in case I had to redo the scan. I disabled the normal spider behavior of ignoring directories specified the the robots.txt file, and I also changed my user agent to be “Mozilla”

wget -m –no-check-certificate  –continue –convert-links   -p –no-clobber -e robots=off -U mozilla “$URL”

Some servers may not like this fast and furious download. You can slow it down by using these options: “–limit-rate=200k  –random-wait –wait=2 ”

I sent the output to a log file. Let’s call it wget.out. I was watching the output, using

tail -f wget.out

I watched the output for errors.  I did notice that there was a noticeable delay  in a host name lookup. I did a name service lookup, and added the hostname/ip address to my machine’s /etc/hosts file. This made the mirroring faster. I also was counting the number of fies being created, using

find . -type f | wc

Problem #3:  Self-referential links cause slow site mirroring.

I noticed that an hour had passed, and only  10 new files we being downloaded. This was a problem. I also noticed that some of the files being downloaded had several consecutive “/” in the path name. That’s not good.

I first grepped for the string ‘///’ and then I spotted the problem. To make sure, I typed

grep /dir1/dir2/webpage.php wgrep.log | awk '{print $3}' | sort | uniq -c | sort -nr 
         15 `webserver/dir1/dir2/webpage.php' 
          2 http://webserver/dir1/dir2/webpage.php 
          2 http://webserver//dir1/dir2/webpage.php 
          2 http://webserver///dir1/dir2/webpage.php 
          2 http://webserver////dir1/dir2/webpage.php 
          2 http://webserver/////dir1/dir2/webpage.php 
          2 http://webserver//////dir1/dir2/webpage.php 
          2 http://webserver///////dir1/dir2/webpage.php 
          2 http://webserver////////dir1/dir2/webpage.php 
          2 http://webserver/////////dir1/dir2/webpage.php 
          2 http://webserver//////////dir1/dir2/webpage.php 

Not a good thing to see. Time for plan B.

Mirroring a web site with wget –spider

I use a method I had tried before – the wget –spider function. This does not download the files. It just gets their name. As it turns out, this is better in many ways. It doesn’t go “recursive” on you, and it also allows you to scan the results, and obtain a list of URL’s. You can edit this list and not download certain files.

Method 2 was done using the following command:

wget --spider --no-check-certificate --continue --convert-links -r -p --no-clobber -e robots=off -U mozilla "$URL"

I sent the output to a file. But it contains filenames, error messages, and a lot of other information. To get the URL’s from this file, I then extracted all of the URLS using

cat wget.out | grep '^--' | \ grep -v '(try:' | awk '{ print $3 }' | \ grep -v '\.\(png\|gif\|jpg\)$' | sed 's:?.*$::' | grep -v '/$' | sort | uniq >urls.out

This parses the wget output file. It removes all *.png *.gif and *.jpg files. It also strips out any parameters on a URL (i.e. index.html?parm=1&parm=2&parm3=3 becomes index.html). It also removes any URL that ends with a “/”. I then eliminate any duplicate URL’s using sort and uniq.

Now I have a list of URLS. Wget has a way for you to download multiple files using the -i option:

wget -i urls.out --no-check-certificate --continue \
--convert-links -p --no-clobber -e robots=off -U Mozilla

Problem #4:   Using a customer’s search engine

A scan of the network revealed a search engine that searched files in its domain. I wanted to make sure that I had included these files in the audit.

I tried to search for meta-characters like ‘.’ , but the web server complained. Instead, I searched for ‘e’ – the most common letter, and it gave me the largest number of hits – 20 pages long.  I examined the URL for page 1, page 2, etc. and noticed that they were identical except for the value “jump=10”, “jump=20”, etc. I wrote a script that would extract all of the URL’s the search engine reported:

#!/bin/sh

for i in $(seq 0 10 200)
do
    URL="http://search.example.com/main.html?query=e&jump="$i"
    wget --force-html -r -l2 "$URL" 2>&1  |  grep '^--' | \
    grep -v '(try:' | awk '{ print $3 }'  | \
    grep -v '\.\(png\|gif\|jpg\)$' | sed 's:?.*$::'
done

It’s ugly, and calls extra processes. I could  write a sed or awk script that replaces five processes with one, but the script would be more complicated and harder to understand to my readers. Also – this was a “throw-away” script. It took me 30 seconds to write it, and the limited factor was network bandwidth. There is always a proper balance between readability, maintainability, time to develop, and time to execute. Is this code consuming excessive CPU cycles? No. Did it allow me to get it working quickly so I can spend time doing something else more productive? Yes.

Problem #5:  wget isn’t consistent

Before I mentioned that I wasn’t happy with wget. That’s because I was not getting consistent results. I ended up repeating the scan of the same server from a different network, and I got different URL’s. I checked, and the second scan found URL’s that the first one missed. I did the best I could to get as many files as possible. I ended up writing some scripts to keep track of the files I scanned before. But that’s another post.

Scanning PDF’s, Word and Excel files.

Now that I had a clone of several websites, I had to scan them for sensitive information. But I have to convert some binary files into ASCII.


Scanning Excel files

I installed gnumeric, and used the program ssconvert to convert the Excel file into text files. I used:

find . -name '*.xls' -o -name '*.xlsx' | \
while IFS= read file; do ssconvert -S "$file" "$file.%s.csv";done

Converting Microsoft Word files into ASCII

I used the following script to convert word files into ASCII

find . -name '*.do[ct]x' -o -name '*. | \
while IFS= read file; do unzip -p "$file" word/document.xml | \
sed -e 's/<[^>]\{1,\}>//g; s/[^[:print:]]\{1,\}//g' >"$file.txt";done

Potential Problems with converting PDF files

Here are some of the potential problems I expected to face

  1. I didn’t really trust any of the tools. If I knew they were perfect, and I had a lot of experience, I could just pick the best one. But I wasn’t confident, so I did not rely on a single tool.
  2. Some of the tools crashed when I used them. See #1 above.
  3. The PDF to text tools generated different results. Also see #1 above.
  4. PDF files are large. Some were more than 1000 pages long.
  5. It takes a lot of time to convert some of the PDF’s into text files. I really needed a server-class machine, and I was limited to a laptop. If the conversion program crashed when it was 90% through, people would notice my vocabulary in the office.
  6. Some of the PDF files were created by scanning paper documents. A PDF-to-text file would not see patterns unless it had some sort of OCR built-in.

Having said that, this is what I did.

How to Convert Acrobat/PDF files into ASCII

This process is not something that can be automated easily. Some of the times when I converted PDF files into text files, the process either aborted, or went into a CPU frenzy, and I had to abort the file conversion.

Also – there are several different ways to convert a PDF file into text. Because I wanted to minimize the risk of missing some information, I used multiple programs to convert PDF files. If one program broke, the other one might cach something.

The tools I used included

  • pdftotext – part of poppler-utils
  • pdf2txt – part of python-pdfminer

Other useful programs were exiftool and peepdf and Didier Steven’s pdf-tools. I also used pdfgrep, but I had to download the latest source, and then compile it with the perl PCRE library.


ConvertPDF – a script to convert PDF into text

I wrote a script that takes each of the PDF files and converts them into text. I decided to use the following convention:

  • *.pdf..txt – output of the pdf2txt file
  • *.pdf.text – output of the pdftotext file

As the conversion of each file takes time, I used a mechanism to see if the output file exists. If it does, I can skip this step.

I also created some additional files naming conventions

  • *.pdf.txt.err – errors from the pdf2txt program
  • *.pdf.txt.time – output of time(1) when running the pdf2txt program
  • *.pdf.text.err – errors from the pdftotext program
  • *.pdf.text.time – output of time(1) when running the pdftotext program

This is useful because if any of the files generate an error, I can use ‘ls -s *.err|sort -nr’ to identify both the program and the input file that had the problem.

The *.time files could be used to see how long it took to run the conversion. The first time I tried this, my script ran all night, and did not complete. I didn’t know if one of the programs  was stuck in an infinite loop or not. This file allows me to keep track of this information.

I used three helper functions in this script. The “X” function lets me easily change the script to show me what it would do, without doing anything. Also – it made it easier to capture STDERR and the timing information. I called it ConvertPDF

#!/bin/bash
#ConvertPDF
# Usage
#    ConvertPDF filename
FNAME="${1?'Missing filename'}"
TNAME="${FNAME}.txt"
TXNAME="${FNAME}.text"

# Debug command - do I echo it, execute it, or both?
X() {
# echo "$@" >&2
 /usr/bin/time -o "$OUT.time" "$@" 2> "$OUT.err"
}

PDF2TXT() {
 IN="$1"
 OUT="$2"
 if [ ! -f "$OUT" ]
 then
     X pdf2txt -o "$OUT" "$IN"
 fi
}

PDFTOTEXT() {
 IN="$1"
 OUT="$2"
 if [ ! -f "$OUT" ]
 then
     X pdftotext "$IN" "$OUT"
 fi
}
if [ ! -f "$FNAME" ]
then
 echo missing input file "$FNAME"
 exit 1
fi
echo "$FNAME" >&2 # Output filename to STDERR
PDF2TXT "$FNAME" "$TNAME" 
PDFTOTEXT "$FNAME" "$TXNAME"

Once this script is created, I called it using

find . -name '*.[pP][dD][fF]' | while IFS= read file; do ConvertPDF "$file"; done

Please note that this script  can be repeated. If the conversion previously occurred, it would not repeat it. That is, if the output files already existed, it would skip that conversion.

As I’ve done it often in the past, I used a handy function above called “X” for eXecute. It just executes a command, but it captures any error message, and it also captures the elapsed time. If I move/add/replace the “#” character at the beginning of the line, I can make it just echo, and not execute anything. This makes it easy to debug without it executing anything.   This is Very Useful.

Problems

Some of the file conversion process took hours. I could kill these processes. Because I captured the error messages, I could also search them to identify bad conversions, and delete the output files, and try again. And again.

Optimizing the process

Because some of the PDF files are so large, and the process wasn’t refined, I wanted to be more productive, and work on the smallest files first, where I defined smallest by “fewest number of pages”. Finding scripting bugs quickly was desirable.

I used exiftool to examine the PDF metadata.  A snippet of the  output of “exiftool file.pdf” might contain:

ExifTool Version Number : 9.74
File Name : file.pdf
.....
[snip]
.....
Producer : Adobe PDF Library 9.0
Page Layout : OneColumn
Page Count : 84

As you can see, the page count is available in the meta-data. We can extract this and use it.

Sorting PDF files by page count

I sorted the PDF files by page count using

for i in *.pdf
do
  NumPages=$(exiftool "$i" | sed -n '/Page Count/ s/Page Count *: *//p')
  printf "%d %s\n" "$NumPages" "$i"
done | sort -n | awk '{print $2}' >pdfSmallestFirst

I used sed to search for ‘Page Count’ and then only print the number after the colon. I then output two columns of information: page count and filename. I sorted by the first column (number of pages) and then printed out the filenames only. I could use that file as input to the next steps.

Searching for credit card numbers, social security numbers, and bank accounts.

If you have been following me, at this point I have directories that contain

  • ASCII based files (.htm, .html, *css, *js, etc.)
  • Excel files converted into ASCII
  • Microsoft Word files converted into ASCII
  • PDF files converted into ASCII.

So it’s a simple matter of using grap to find files.  My tutorial on Regular Expressions is here if you have some questions    Here is what I used to search the files

find dir1 dir2...  -type f -print0| \
xargs -0 grep -i -P '\b\d\d\d-\d\d-\d\d\d\d\b|\b\d\d\d\d-\d\d\d\d-\d\d\d\d-\d\d\d\d\b|\b\d\d\d\d-\d\d\d\d\d\d-\d\d\d\d\d\b|account number|account #'

The regular expressions I used are perl-compatible. See pcre(3) and PCREPATTERN(3) manual pages. The special characters are
\d – a digit
\b – a boundary – either a character, end of line, beginning of line, etc. – This prevents 1111-11-1111 from matching a SSN.

This matches the following patterns
\d\d\d-\d\d-\d\d\d\d – SSN
\d\d\d\d-\d\d\d\d-\d\d\d\d-\d\d\d\d – Credit card number
\d\d\d\d-\d\d\d\d\d\d-\d\d\d\d\d – AMEX credit card

There were some more things I did, but this is a summary
It should be enough to allow someone to replicate the task

Lessons learned

  • pdf2txt is sloooow
  • Your tools aren’t perfect. You can’t assume a single tool will find everything. Plan for failures and backup plans.
  • Look for ways to make your work more productive, e.g. find errors faster. You don’t want to wait 30 minutes to discover a coding error that will cause you to redo the operation. If you can find the error in 5 minutes you have saved 25 minutes.
  • Keep your shell scripts out of the directory containing the files. I downloaded more than 20000 files, and it became difficult to keep track of the names and jobs of the small scripts I was using, and the temporary files they created.
  • Consider using a Makefile to keep track of your actions. It’s a great way to document and reuse various scripts. I’ll write a blog on that later.
  • Watch out for duplicate names/URLs.
  • You have to remember that when you find a match in a file, you have to find the URL that corresponds to it. So consider your naming conventions.
  • Be careful of assumptions. Not all credit cards use the xxxx-xxxx-xxxx-xxxx format. Amex uses xxxx-xxxxxx-xxxxx


Have fun


Posted in Linux, Security, Shell Scripting | Tagged , , , , , , , , , , , , , , , , , | 1 Comment

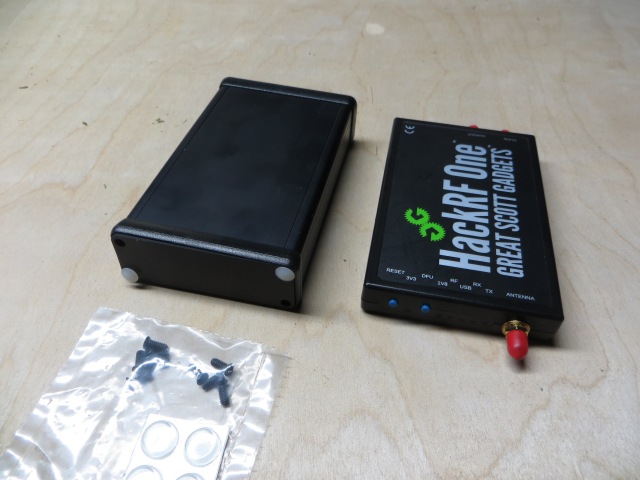
I purchased a HackRF device from Kickstarter, and some people recommend that shielding will help improve the reception. Nooelec sells an optional shield, but I thought a metal case would provide better shielding, for a few more dollars. Mike Ossmann says the HackRF is made to work with the Hammond  1455J1201 so I searched Element14’s site and bought a black case. At the time the case was $20.68, but as I write this it seems to have jumped up to $35. Mouser sells this case for $18.70.

Here is the Hammond case shown next to the original plastic case

Hammond Case

Hammond Case

And here is the case taken apart

Case disassembled

Case disassembled

I wanted to drill the holes carefully, and make it look nice. I asked on the hackrf mailing list for some information on the location of the holes, and Stefano Probst game me a link to the output from Kicad, which he’s made available here.

However, I wasn’t going to use any sort of CNC-controlled mill/drill. I was going to drill the holes by hand.  How was I going to accurately drill the holes from the above file?

First I examined the specifications of the Hammond case.  This says the end plates are 3.071 inches long. So I just needed a way to print out the SVG file to be the save size. I used the free software Sure Cuts-a-lot 4 software, which had a ruler tool in the program that allowed me to measure the size of the end plate before I printed it. Then I cut out the paper.

Checking the size

Checking the size

I checked that the paper was the same size as the end plate. I then used rubber cement to glue the paper onto the end plate, carefully lining up the edges.

Then I used a punch to mark the exact center of the holes.

Using the punch

Using the punch

To be more precise, I first used a scriber or prick punch to mark the center of the hole. Then I examined the mark carefully to make sure it was in the exact center (this is important). Then I used an automatic center punch (or you can use a simple metal punch and a hammer) to make the hole deeper.

If you didn’t get the holes in the proper place, you can place the punch in the correct position, which may be a little on the other side of the center, and try again. By overshooting the center a little, the new hole will “fill in” towards the old hole, and end up between the new and old positions.

Once the holes are correctly marked, and made deep enough for a drill bit to go through the metal without wandering, you should fasten the end plate to a wooden block. I used 6×3/4″ wood screws to do this:

Fastening the cap to the board

Fastening the cap to the boardThi

Make sure you have the plates on the correct side, as the screw holes are countersunk, and you want that side to be upward.

This wooden block is a safety precaution, because drilling metal plates can be dangerous when the drill jams in the metal and the entire plate starts revolving around the drill bit. The wooden block also provides a backing board for the through holes.

Now we have to drill the holes. I used a drill gauge to measure the hole diameters. The drill bits you need are 5/64″, 5/32″ and 1/4″.  You should use the 5/64″ to drill pilot holes for the larger holes. I used a table-top drill press, but a hand drill should also work.

The odd-shape USB connecter cut-out is made from smaller holes used as a pilot, and then a small flat needle file is used to smooth out the cut-out:

Cleaning up the USB cutout

Cleaning up the USB cutout

The holes may have a rough edge, so you probably want to remove these edges. You can use sandpaper, or a deburring tool. To use a deburring tool, insert the blade and spin it around the hole. You can also use a counter-sink bit. The little holes for the LED’s were too small to allow this. I used a file to eliminate the burrs in that case.

I then testing the fit by hand:

Testing the fit

Testing the fit

I did have to use a round needle file to make one of the holes a little wider. But everything fit together very nicely.

I plan to add a shielding strap to the case, and test the changes in RF sensitivity to the plastic case vs the aluminum case.

I did have a little problem with the screws into the case. I may have to re-tap the threads in the holes.

Posted on by grymoire | 2 Comments